Keeping your motorcycle running smoothly requires understanding its potential issues. This guide provides a practical approach to diagnosing four common problems: engine trouble, electrical faults, brake problems, and, we’ll equip you with the knowledge to identify and address these issues efficiently, saving you time, money, and potential roadside frustration. From understanding the basics of your motorcycle’s systems to performing simple diagnostic checks, we’ll walk you through the process step-by-step.
We will cover practical troubleshooting steps for each issue, including identifying symptoms, utilizing readily available tools, and understanding the underlying causes. The goal is to empower you to confidently address minor problems yourself and to better understand when professional assistance is needed. This guide serves as a valuable resource for both novice and experienced motorcycle riders alike.
Diagnosing Engine Problems
A motorcycle engine’s failure to start or operate correctly can stem from several interconnected issues. Accurately diagnosing the problem requires a systematic approach, checking the most likely culprits first. This section details common causes and provides a step-by-step guide for troubleshooting.
Common Causes of Engine Starting Failure
A motorcycle engine’s inability to start usually points to problems with the battery, ignition system (spark plug), or fuel delivery. Less frequently, issues within the engine itself, such as low compression, may be responsible. Addressing these areas systematically increases the chances of a quick and accurate diagnosis.
Battery, Spark Plug, and Fuel System Checks
A systematic approach is crucial for efficient troubleshooting. First, verify the battery’s charge using a multimeter. A reading below 12.6 volts indicates a low charge. Next, inspect the spark plug for damage or fouling. A clean, properly gapped spark plug should produce a strong, blue spark when grounded and the ignition system is activated. Finally, check the fuel system for proper fuel flow and pressure. Inspect the fuel lines for leaks and ensure the fuel pump is functioning correctly. A clogged fuel filter or a faulty fuel pump can restrict fuel delivery.
Troubleshooting a Misfire
A misfire is characterized by rough running, sputtering, or backfiring. Several factors can contribute to a misfire, including faulty spark plugs, damaged ignition wires, low fuel pressure, or incorrect air-fuel mixture. Diagnosing a misfire often involves checking spark plug condition, inspecting ignition wires for damage or cracks, verifying fuel pressure using a fuel pressure gauge, and analyzing the air-fuel mixture using a specialized tool or by observing exhaust color. A consistently rich or lean mixture points to carburetor or fuel injection issues.
Comparison of Engine Problem Symptoms
The following table summarizes symptoms associated with different engine problems:
| Problem | Symptoms |
|---|---|
| Lack of Power | Sluggish acceleration, difficulty climbing hills, engine struggles under load. |
| Unusual Noises (Knocking, Rattling) | Loud knocking sounds, often rhythmic, indicating potential bearing wear or piston damage. Rattling noises might suggest loose parts or valve train issues. |
| Excessive Smoke (Blue, White, Black) | Blue smoke often indicates burning oil. White smoke usually signals coolant leakage into the combustion chamber. Black smoke suggests a rich fuel mixture. |
| Overheating | Engine temperature gauge reading high, steam or smoke emanating from the engine, potential for engine seizure. |
Testing Motorcycle Engine Compression
Testing compression involves using a compression tester, a specialized tool that measures the pressure within the cylinder when the piston is at its top dead center. First, remove the spark plug from the cylinder. Then, install the compression tester into the spark plug hole. Next, crank the engine over several times and observe the reading on the compression gauge. Compare the reading to the manufacturer’s specifications for your motorcycle model. Low compression in one or more cylinders points to potential problems like worn piston rings, valve issues, or a blown head gasket. Consistent low compression across all cylinders may indicate issues with the engine’s overall condition or a problem with the testing procedure. Always consult your motorcycle’s service manual for specific instructions and recommended compression values.
Identifying Electrical Issues
Electrical problems in motorcycles can range from minor inconveniences to complete system failures, leaving you stranded. A methodical approach to diagnosing these issues is crucial for safe and efficient troubleshooting. This section details how to systematically check your motorcycle’s electrical system, focusing on the battery, alternator, and wiring, as well as testing fuses and relays.
Battery Testing
A weak or dead battery is a common source of electrical problems. Before investigating more complex components, it’s essential to ensure the battery is functioning correctly. A simple voltage test with a multimeter is the first step. With the motorcycle off, a healthy battery should read approximately 12.6 volts. A reading below 12 volts indicates a low charge, while a reading significantly lower suggests a faulty battery requiring replacement. Furthermore, a load test, which involves placing a load on the battery while measuring voltage, can reveal its ability to deliver current under demand. A significant voltage drop during the load test points to a weak battery, even if the resting voltage appears normal.
Alternator and Charging System Testing
The alternator is responsible for charging the battery while the engine runs. A faulty alternator will prevent the battery from recharging, eventually leading to a dead battery and electrical system failure. To test the charging system, start the engine and measure the voltage across the battery terminals. A healthy charging system should show a voltage between 13.5 and 14.5 volts. A lower voltage suggests a problem with the alternator, regulator/rectifier, or wiring. A voltage significantly higher than 14.5 volts indicates a possible regulator/rectifier failure, which can damage the battery. A step-by-step guide for safely testing the charging system is provided below.
Step-by-Step Guide to Safely Testing the Motorcycle’s Charging System
- Ensure the motorcycle is turned off and the engine is cool.
- Connect the positive lead of your multimeter to the positive (+) battery terminal and the negative lead to the negative (-) terminal.
- Start the engine and observe the voltage reading. It should be between 13.5 and 14.5 volts. Note that the exact voltage range may vary depending on the motorcycle model and engine RPM.
- If the voltage is outside the normal range, check the alternator’s output directly. This may require accessing the alternator wiring harness, following the motorcycle’s service manual for safe and accurate connection points.
- With the engine running, measure the voltage at the alternator’s output terminals. A low voltage here confirms an alternator issue. A high voltage points towards a regulator/rectifier malfunction.
- If the alternator output is normal, but the battery voltage is low, inspect the wiring for breaks, corrosion, or loose connections. Pay close attention to the connections between the alternator, battery, and regulator/rectifier.
- Always disconnect the battery’s negative terminal before performing any electrical work to prevent accidental short circuits.
Fuse and Relay Testing
Fuses and relays are protective devices that prevent damage to the electrical system. A blown fuse or a faulty relay can interrupt the flow of electricity to specific components. Fuses are easily checked visually; a broken filament indicates a blown fuse. Relays can be tested using a multimeter to check for continuity and proper switching. A multimeter can also be used to check for power at the relay’s input and output terminals. Always replace fuses with the correct amperage rating.
Wiring Inspection
Faulty wiring is a frequent culprit in electrical problems. Inspect all wiring harnesses for signs of damage, such as fraying, cuts, or corrosion. Look for loose connections or terminals. Repair or replace any damaged wiring, ensuring proper insulation and secure connections. Pay particular attention to areas exposed to vibration or moisture.
Common Electrical Symptoms and Likely Causes
| Symptom | Likely Cause |
|---|---|
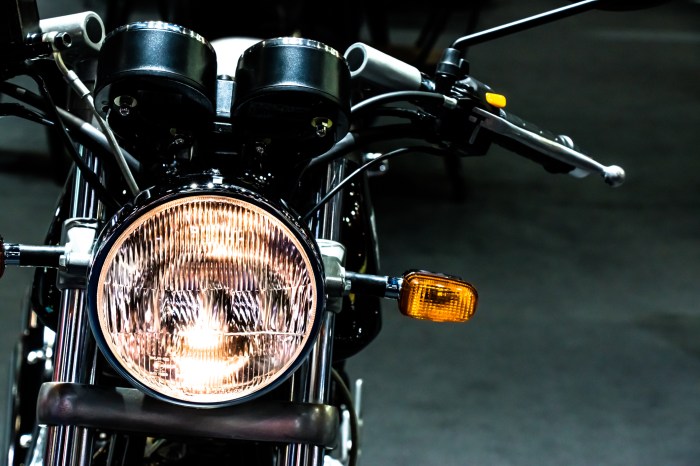
| Headlights don’t work | Blown fuse, faulty switch, wiring problem, bad bulb |
| Turn signals don’t work | Blown fuse, faulty switch, bad bulb, wiring problem |
| Battery dies quickly | Faulty alternator, bad regulator, parasitic drain, weak battery |
| Electrical components intermittently fail | Loose connection, corroded terminal, faulty wiring |
| No power to any electrical components | Dead battery, faulty main switch, blown main fuse |
Troubleshooting Brake Problems

Motorcycle brakes are critical for safe riding, and understanding their function and potential issues is essential for every rider. Regular maintenance and prompt attention to any unusual behavior can prevent serious accidents. This section will cover common brake problems, focusing on diagnosis and basic troubleshooting techniques.
Motorcycle Brake Systems and Components
Most motorcycles utilize either disc brakes or drum brakes, or a combination of both. Disc brakes, featuring a rotor and caliper with brake pads, offer superior stopping power and are more common on modern motorcycles. Drum brakes, using a rotating drum and internal shoes, are generally found on older models or as rear brakes on some less expensive machines. Both systems rely on hydraulic pressure to activate the brakes. Key components include the brake lever or pedal, master cylinder, brake lines, calipers or wheel cylinders, and the brake pads or shoes themselves. A malfunction in any of these components can lead to reduced braking performance or complete failure.
Disc Brake System Problems and Diagnosis
Symptoms of disc brake failure can include a spongy brake lever, reduced braking power, or a complete loss of braking. Common causes include low brake fluid, worn or contaminated brake pads, a leaking master cylinder, or air in the brake lines. A visually worn brake pad, easily identified by its thinness or scoring, will directly reduce braking effectiveness. A leaking master cylinder will lead to a gradual loss of brake fluid and braking power. Air in the brake lines can create a spongy feeling at the lever, as the air is compressible.
Drum Brake System Problems and Diagnosis
Drum brake problems often manifest as a gradual decrease in braking power, often accompanied by a dragging sensation or unusual noise. Common causes are worn brake shoes, contaminated brake fluid, a malfunctioning wheel cylinder, or a broken return spring. Worn brake shoes will show significant wear and may even have metal-to-metal contact with the drum. A leaking wheel cylinder will cause similar problems to a leaking master cylinder in a disc brake system.
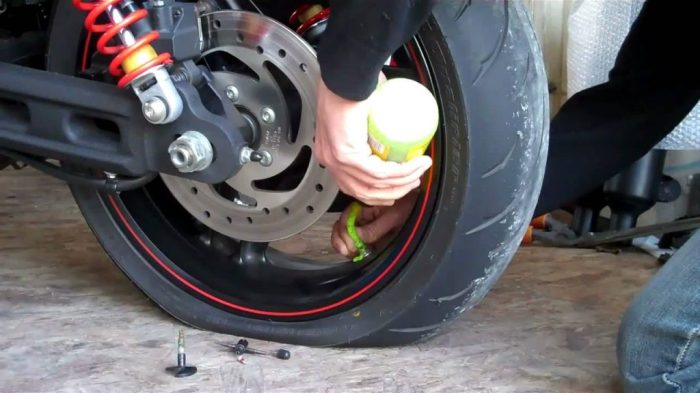
Checking Brake Fluid Levels and Bleeding Brakes
Regularly checking brake fluid levels is crucial for safe riding. The brake fluid reservoir, usually located near the master cylinder, should be kept filled to the designated level. Low brake fluid indicates a leak somewhere in the system. Bleeding the brakes removes air from the brake lines, restoring proper braking function.
Procedure for Checking Brake Fluid Levels
1. Locate the brake fluid reservoir.
2. Check the fluid level against the minimum mark on the reservoir.
3. If low, carefully add DOT 3 or DOT 4 brake fluid (check your motorcycle’s manual for the correct type). Never overfill.
Procedure for Bleeding Brakes
1. Gather necessary tools: wrench (to fit the bleeder valve), clear tubing, container, brake fluid, and a helper.
2. Place the tubing over the bleeder valve and submerge the other end in the container.
3. Have your helper pump the brake lever or pedal several times and hold it.
4. Open the bleeder valve slightly, allowing fluid and air to escape.
5. Close the bleeder valve when the fluid runs clear.
6. Repeat steps 3-5 until no more air bubbles are visible.
7. Check brake fluid level and add more if needed.
Tools Needed for Basic Brake Maintenance
A basic set of tools for brake maintenance includes:
- Wrench (to fit bleeder valves and caliper bolts)
- Screwdrivers (various sizes)
- Clear tubing
- Container
- Brake fluid
- Gloves
- Shop rags
It is important to consult your motorcycle’s service manual for specific procedures and torque specifications. Improper maintenance can lead to brake failure.
Conclusive Thoughts
Mastering the art of motorcycle diagnostics empowers you to maintain your machine’s peak performance and enjoy the open road with confidence. By understanding the common causes of engine failures, electrical glitches, and brake problems, you’ll be well-equipped to handle minor issues yourself, saving you time and money. Remember, preventative maintenance and regular checks are key to avoiding larger, more expensive repairs down the line. So, get out there, and keep the rubber side down!