A malfunctioning keyboard can significantly disrupt your workflow. From sticky keys to complete unresponsiveness, keyboard issues can range from minor annoyances to major productivity roadblocks. This guide provides a straightforward, four-step process to effectively diagnose and resolve common keyboard problems, whether the source is a software glitch or a hardware failure. We’ll cover everything from simple visual inspections to more advanced troubleshooting techniques, empowering you to regain control of your typing experience.
By systematically investigating potential software and hardware problems, this guide helps you pinpoint the cause of your keyboard difficulties. We’ll explore methods for checking operating system settings, updating drivers, cleaning your keyboard, and even testing it on a different machine. Whether you’re a seasoned tech user or a novice, this step-by-step approach will equip you with the knowledge to troubleshoot and resolve your keyboard issues efficiently.
Identifying Keyboard Issues
Troubleshooting keyboard problems begins with accurate identification of the issue. Understanding the different types of malfunctions and their potential causes is crucial for effective diagnosis and repair. This section will guide you through the process of identifying whether your keyboard problems stem from hardware or software, and provide a structured approach to pinpointing the source of the malfunction.
Common Keyboard Malfunctions and Their Causes
Keyboard malfunctions manifest in various ways. Some common issues include unresponsive keys, sticky keys, keys repeating characters, or complete keyboard failure. These problems can arise from both hardware and software sources. Hardware problems often involve physical damage to the keyboard itself, such as broken keys, damaged wiring, or internal component failure. Software issues, on the other hand, might be caused by driver conflicts, operating system glitches, or incorrect keyboard settings. For example, a spilled drink could lead to multiple keys becoming unresponsive (hardware), while a conflicting driver might cause random keystrokes (software).
Visual Inspection for Physical Damage
A thorough visual inspection is the first step in diagnosing a hardware keyboard problem. Follow these steps:
- Carefully examine the keyboard’s surface for any visible damage, such as cracks, broken keys, or debris lodged between keys. Pay close attention to the areas around the keys, looking for any signs of damage to the casing.
- Check the keyboard cable (if applicable) for any kinks, breaks, or loose connections. A damaged cable can prevent communication between the keyboard and the computer.
- Inspect the connection points on both the keyboard and the computer. Ensure that the keyboard is securely plugged in. Try reseating the connection to make sure it is properly established.
- If your keyboard is wireless, check the battery level and ensure that the wireless receiver is properly connected to the computer. Try replacing the batteries with fresh ones as a test.
Differentiating Between Hardware and Software Keyboard Problems
The distinction between hardware and software keyboard problems is crucial for effective troubleshooting. Hardware problems usually involve physical damage to the keyboard itself, resulting in issues like unresponsive keys, sticky keys, or keys that produce incorrect characters consistently. Software problems, conversely, manifest as erratic behavior, such as random keystrokes, keys sticking intermittently, or complete keyboard failure that seems to appear and disappear. Rebooting the computer often resolves temporary software glitches, but it won’t fix a broken key.
Flowchart for Initial Troubleshooting
The following flowchart guides you through initial troubleshooting steps:
Start --> Is the keyboard connected properly?
    Yes --> Is the keyboard working in another computer?
        Yes --> Software issue. Proceed to software troubleshooting steps.
        No --> Hardware issue. Proceed to hardware troubleshooting steps.
    No --> Check connections. Try a different port. Is the keyboard working now?
        Yes --> Connection issue resolved.
        No --> Hardware issue. Proceed to hardware troubleshooting steps.
Comparison of Keyboard Malfunction Symptoms
The following table summarizes the symptoms of different keyboard malfunctions:
| Malfunction | Symptoms | Possible Causes | Troubleshooting Steps |
|---|---|---|---|
| Unresponsive Keys | Specific keys don’t work. | Physical damage, driver issues, or faulty connections. | Check for physical damage, reinstall drivers, test on another computer. |
| Sticky Keys | Keys remain activated after release. | Debris under keys, physical damage, or software glitches (Sticky Keys accessibility feature). | Clean under keys, check for physical damage, disable Sticky Keys feature. |
| Repeating Keys | Keys repeat characters uncontrollably. | Physical damage, faulty connections, or driver problems. | Check for physical damage, test on another computer, reinstall drivers. |
| Ghosting | Multiple characters appear when only one key is pressed. | Faulty matrix or controller in the keyboard (hardware). | Replace keyboard. |
Software Troubleshooting

Software issues can often mimic hardware problems, leading to keyboard malfunctions. Thorough software troubleshooting is crucial before concluding a hardware failure. This involves examining your operating system’s keyboard settings, utilizing the on-screen keyboard, updating or reinstalling drivers, running system scans, and checking for malware.
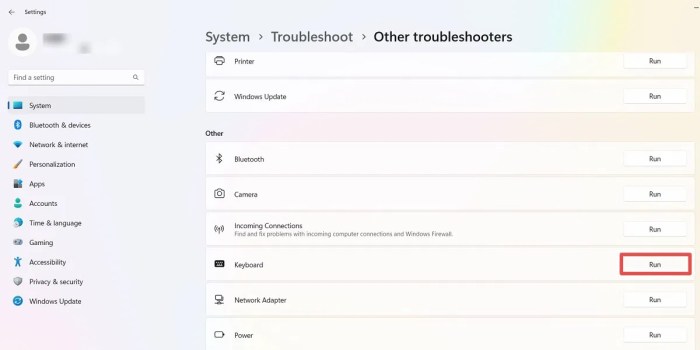
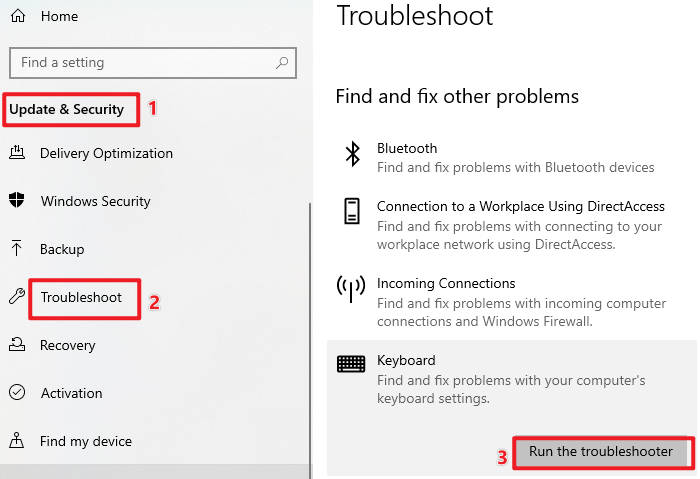
Checking Keyboard Settings
Accessing and modifying keyboard settings varies slightly depending on your operating system (Windows, macOS, Linux). However, the general process involves navigating to your system settings, usually found through the control panel or system preferences. Within these settings, look for options related to keyboard layout, input methods, repeat rate, and key responsiveness. Ensure the correct keyboard layout is selected, and adjust the repeat rate and key responsiveness to your preferences. If you’ve recently made changes to these settings, reverting them to their previous state might resolve the issue.
Using the On-Screen Keyboard
The on-screen keyboard provides a valuable diagnostic tool. If your physical keyboard is malfunctioning, but the on-screen keyboard functions correctly, the problem almost certainly lies with your physical keyboard, not the software. To access the on-screen keyboard, search for “on-screen keyboard” in your operating system’s search bar. If the on-screen keyboard also malfunctions, the issue is more likely software-related or a deeper system problem.
Updating or Reinstalling Keyboard Drivers
Outdated or corrupted keyboard drivers are a common cause of keyboard malfunctions. Updating or reinstalling them can often rectify these issues. To update drivers, you can use the device manager (Windows) or system information (macOS). Locate your keyboard in the list of devices, right-click, and select “Update driver.” Alternatively, you can visit the manufacturer’s website for your keyboard or your computer’s manufacturer’s website to download the latest drivers. If updating doesn’t work, try uninstalling the current driver and then restarting your computer. Windows will usually automatically reinstall the driver.
Running a System Scan
System scans can detect conflicts between software or hardware components that may affect keyboard functionality. Windows’ built-in System File Checker (SFC) can scan for and repair corrupted system files. To run SFC, open Command Prompt as an administrator and type sfc /scannow and press Enter. For macOS, Disk Utility can check for and repair disk errors. Third-party utilities also offer more comprehensive system scans, capable of detecting potential conflicts not identified by built-in tools. Running a comprehensive scan can reveal hidden conflicts that are interfering with the keyboard.
Checking for and Removing Malware
Malware can interfere with keyboard functionality, causing erratic behavior or complete keyboard failure. Regularly running a reputable antivirus or anti-malware program is crucial. If a scan detects malware, follow the program’s instructions to remove it. After removing malware, restart your computer to ensure the changes take effect and test your keyboard’s functionality. Remember to keep your antivirus software up-to-date for optimal protection.
Hardware Troubleshooting

If software troubleshooting hasn’t resolved your keyboard issues, it’s time to investigate potential hardware problems. This section details methods to diagnose and, if necessary, fix these problems. Remember to always power down your computer before undertaking any hardware maintenance.
Testing Individual Keys with a Keyboard Tester
A keyboard tester, either a dedicated device or software application, allows for precise testing of each key’s functionality. These tools typically display the key pressed and its corresponding scan code. Discrepancies between expected and displayed output pinpoint faulty keys. For example, if you press ‘A’ and the tester shows ‘B’ or no output, the ‘A’ key or its associated circuitry is likely defective. Using a keyboard tester is a precise way to isolate problems to specific keys, rather than assuming an entire keyboard failure.
Cleaning the Keyboard to Remove Dust and Debris
Accumulated dust, crumbs, and other debris can interfere with key responsiveness and functionality. Cleaning your keyboard is a straightforward preventative measure and often resolves minor issues. Begin by turning off your computer and unplugging the keyboard. Then, gently invert the keyboard and tap it to dislodge loose particles. Use compressed air to blow out debris from between the keys. For more stubborn dirt, use a soft-bristled brush or cotton swab dipped in isopropyl alcohol (ensure it’s not overly wet to avoid damaging internal components). Remember to allow the keyboard to dry completely before reconnecting it.
Disconnecting and Reconnecting the Keyboard
A simple disconnect and reconnect can sometimes resolve temporary connection problems. First, power down your computer. Then, unplug the keyboard from its port (usually USB). Wait a few seconds, then plug it back in securely. Restart your computer and check if the keyboard is functioning correctly. This simple step often resolves minor connection glitches.
Testing the Keyboard on a Different Computer
Testing your keyboard on another computer helps determine if the problem lies with the keyboard itself or the original computer. Connect the keyboard to a different working machine. If the keyboard works fine on the other computer, the issue likely resides within the original computer’s system (motherboard, drivers, etc.). Conversely, if the keyboard malfunctions on both computers, the problem is almost certainly with the keyboard itself.
Replacing a Faulty Keyboard
If testing confirms a hardware failure, replacing the keyboard is necessary. Follow these steps carefully:
- Power down your computer and unplug it from the power source. This is crucial for safety.
- Disconnect the faulty keyboard. Carefully unplug the keyboard cable from the computer.
- Acquire a replacement keyboard. Choose a compatible keyboard model for your computer.
- Connect the new keyboard. Plug the new keyboard’s cable into the computer’s appropriate port.
- Power on your computer. Check if the new keyboard is working correctly.
- Install necessary drivers (if required). Some keyboards may require specific drivers, which can be downloaded from the manufacturer’s website.
Closing Summary
Successfully diagnosing keyboard problems often involves a combination of software and hardware checks. By following the four-step process Artikeld in this guide – identifying the issue, troubleshooting software, addressing hardware concerns, and potentially replacing the keyboard – you’ll be well-equipped to resolve most common keyboard malfunctions. Remember, a methodical approach is key, starting with the simplest solutions and progressing to more complex ones. With a little patience and these helpful steps, you can get your keyboard working perfectly again and get back to your tasks without interruption.