Maintaining your car’s tires is crucial for safety and performance. Ignoring tire issues can lead to accidents, reduced fuel efficiency, and costly repairs. This guide provides a seven-step process to effectively diagnose common tire problems, empowering you to address them promptly and prevent further damage. We’ll cover visual inspections, tread depth checks, pressure evaluation, and identification of specific wear patterns and damage, enabling you to understand the underlying causes and take appropriate action.
By following these simple steps, you can gain a deeper understanding of your tires’ condition and proactively maintain their optimal performance. Early detection of tire problems can save you money and ensure a safer driving experience. This guide equips you with the knowledge and tools to become more confident in assessing your vehicle’s tire health.
Visual Inspection and Initial Assessment
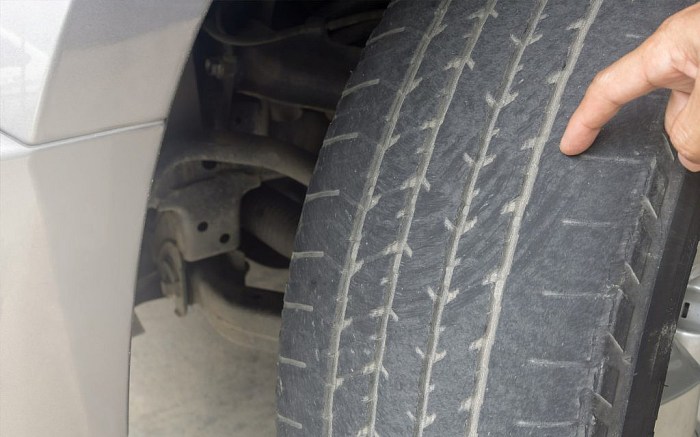
A thorough visual inspection is the first and often most crucial step in diagnosing tire problems. It allows for a quick assessment of the tire’s overall condition and can pinpoint several common issues before they escalate into more serious, and potentially dangerous, problems. This initial assessment significantly informs subsequent diagnostic steps and helps prioritize necessary repairs or replacements.
A systematic approach is key to a successful visual inspection. The following checklist details the key aspects to examine.
Tire Inspection Checklist
| Item | Acceptable Condition | Concerning Condition | Action Required |
|---|---|---|---|
| Tread Depth | Uniform tread depth across the tire, with at least 2/32 inch remaining (or the wear bar indicator visible). | Uneven wear, significant tread depth loss below 2/32 inch, or missing tread sections. | Measure tread depth with a tread depth gauge. Consider tire replacement if below minimum depth or uneven wear is significant. |
| Sidewall Condition | No bulges, cuts, cracks, or embedded objects. Sidewalls are smooth and intact. | Bulges, cuts, cracks, embedded objects, or significant abrasions on the sidewalls. | Inspect carefully for any damage that compromises the structural integrity of the tire. Replacement is likely necessary. |
| Overall Wear Patterns | Even wear across the entire tire surface. | Feathering (cupped or feathered edges), one-sided wear, center wear, shoulder wear, or excessive wear on one specific area. | Investigate the cause of uneven wear (alignment issues, suspension problems, inflation pressure). Tire rotation may help, but replacement might be necessary depending on severity. |
| Tire Pressure | Inflation pressure within the recommended range (check the sticker on the driver’s side doorjamb or owner’s manual). | Underinflation or overinflation. | Adjust tire pressure to the manufacturer’s recommendation. Regularly check tire pressure. |
Post-Inspection Decision Flowchart
The following flowchart illustrates the decision-making process after completing the visual inspection.
(Imagine a flowchart here. The flowchart would begin with “Complete Visual Inspection.” If the inspection reveals no significant problems, the flow would lead to “Continue Driving, Monitor Tire Condition.” If significant problems are found (e.g., low tread, sidewall damage, uneven wear), the flow would branch to “Further Diagnosis Required” which then branches to options such as “Professional Tire Inspection,” “Wheel Alignment Check,” “Suspension System Check,” or “Tire Replacement.”)
Examples of Common Tire Problems Identified Through Visual Inspection
Visual inspection can reveal a variety of tire problems. Understanding their causes and potential consequences is crucial for safe driving.
- Uneven Wear: This often indicates problems with wheel alignment, suspension components, or improper inflation. Consequences can include reduced tire life, poor handling, and increased risk of tire failure.
- Feathering: A feathered edge indicates misalignment or worn suspension components. This results in uneven contact with the road surface, leading to reduced traction and premature wear.
- Bulges or Blisters: These are signs of internal damage to the tire structure, possibly caused by impact or improper inflation. Driving on a tire with a bulge or blister can lead to a sudden blowout.
- Cracks or Cuts: These can weaken the tire’s structure and reduce its ability to hold air. Severe cracks or cuts can lead to tire failure. Exposure to UV radiation and extreme temperatures accelerate this deterioration. For example, a tire left outside in harsh sunlight for extended periods may show significant cracking even if it has not experienced much wear from driving.
Tread Depth and Pressure Check
Maintaining the correct tire pressure and tread depth is crucial for optimal vehicle performance, safety, and longevity. Neglecting these aspects can lead to reduced fuel efficiency, compromised handling, and potentially dangerous driving conditions. This section will guide you through accurately checking both tire pressure and tread depth.
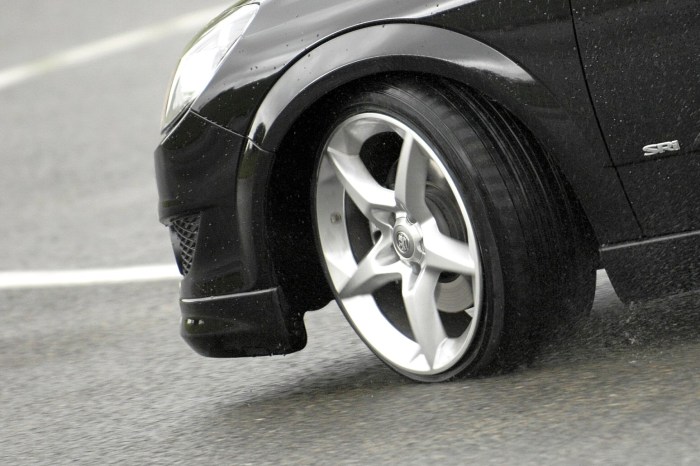
Proper tire pressure significantly impacts fuel efficiency and handling. Underinflated tires increase rolling resistance, forcing your engine to work harder and consuming more fuel. Conversely, overinflation reduces the tire’s contact patch with the road, diminishing traction and handling, particularly in wet or icy conditions. Maintaining the recommended tire pressure, as specified in your vehicle’s owner’s manual or on the tire sidewall, ensures optimal performance and safety.
Measuring Tire Tread Depth
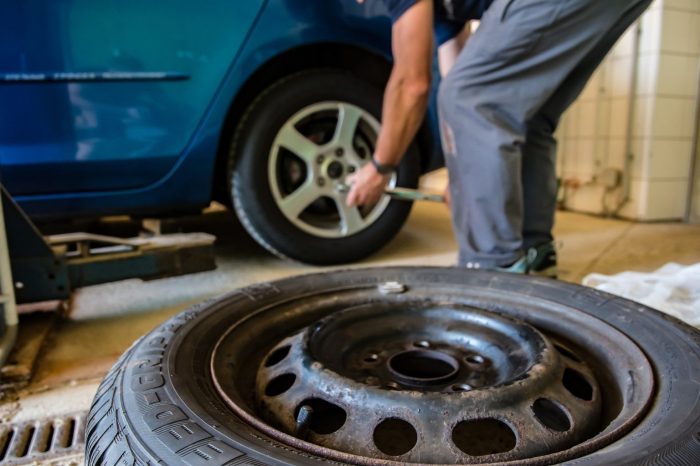
Accurately measuring your tire tread depth is essential for determining when tire replacement is necessary. Using a tread depth gauge provides the most precise measurement, but several alternative methods can be employed.
- Using a Tread Depth Gauge: A tread depth gauge is a simple, inexpensive tool specifically designed for this purpose. Insert the gauge’s probe into the deepest part of the tire tread groove. The gauge will directly display the tread depth in millimeters or thirty-seconds of an inch. Repeat this process at several points across the tire’s width to get an average reading.
- Using a Penny: Insert a penny, Lincoln’s head down, into the tread groove. If you can see the top of Lincoln’s head, your tread depth is less than 2/32 of an inch, indicating the need for replacement. This method is less precise but provides a quick visual assessment.
- Using a Ruler: While less accurate than a gauge, a ruler can be used by carefully measuring the depth of the tread groove. This requires more care and precision than using a gauge or penny.
Consequences of Improper Tire Inflation
Underinflation and overinflation both carry significant risks. Underinflation leads to excessive tire flexing, generating heat and causing premature wear in the tire sidewalls. This can lead to tire failure, often resulting in a blowout, which can cause accidents. For example, a sudden blowout at high speed can lead to loss of control and a serious collision. Furthermore, underinflated tires increase fuel consumption, as mentioned earlier. A real-world example shows that underinflated tires can reduce fuel economy by up to 3%.
Overinflation, on the other hand, reduces the tire’s contact patch with the road, diminishing traction and stability. This makes braking and handling more difficult, particularly on wet or slippery surfaces. Overinflation also increases the risk of tire damage from road impacts, as the tire is less able to absorb shocks. A sharp object striking an overinflated tire is more likely to puncture it compared to a properly inflated tire. Additionally, overinflation can cause uneven wear on the center of the tire.
Identifying Specific Tire Problems
Understanding tire wear patterns and damage is crucial for maintaining vehicle safety and performance. Recognizing these issues allows for timely repairs, preventing more extensive and costly damage down the line. By carefully examining your tires, you can identify potential problems and address their root causes.
Different wear patterns often point to specific underlying mechanical issues. For instance, uneven wear can indicate problems with wheel alignment, while cupping suggests a need for wheel balancing. Similarly, feathering often points towards suspension problems. Recognizing these patterns is the first step in diagnosing the problem effectively.
Tire Wear Patterns and Their Causes
Several distinct wear patterns can develop on tires, each signaling a different underlying problem. The following table summarizes common wear patterns and their associated causes.
| Wear Pattern | Cause |
|---|---|
| Uneven Wear (One side more worn than the other) | Improper wheel alignment (toe, camber, caster), worn suspension components (ball joints, tie rod ends), different tire pressures between wheels. |
| Cupping (Uneven wear with a series of dips and bumps around the circumference) | Poor wheel balance, worn shock absorbers or struts, damaged suspension components. |
| Feathering (One side of the tread is worn more than the other, creating a feathered edge) | Improper caster or camber angles, worn suspension components, worn or damaged ball joints. |
| Center Wear | Overinflation. |
| Shoulder Wear | Underinflation. |
Signs of Tire Damage
Beyond wear patterns, direct damage to the tire structure poses significant safety risks. Identifying these issues promptly is paramount to preventing accidents.
Punctures, bulges, cracks, and cuts are all serious indicators of tire damage. Punctures, caused by objects penetrating the tire, can lead to rapid deflation. Bulges, often caused by internal damage or impact, indicate structural weakness and a high risk of blowout. Cracks and cuts, especially those extending deep into the tire’s sidewall, compromise its structural integrity, making it susceptible to failure under stress. Ignoring these signs can result in loss of control and potentially serious accidents.
Potential Underlying Mechanical Issues
Tire problems are not always isolated incidents. Often, they are symptoms of deeper mechanical issues within the vehicle’s suspension and braking systems. Addressing these underlying problems is crucial for long-term tire health and overall vehicle safety.
- Wheel Alignment: Misalignment of the wheels (toe, camber, caster) directly affects tire wear and handling. Regular alignment checks are recommended.
- Suspension Components: Worn or damaged suspension components (shock absorbers, struts, ball joints, tie rod ends) significantly impact tire wear and vehicle stability. These components should be inspected regularly for wear and tear.
- Braking System Issues: Uneven braking force can lead to uneven tire wear, particularly on the front wheels. Regular brake inspections are essential to ensure proper function.
Final Wrap-Up
Regular tire maintenance is essential for safe and efficient driving. This seven-step diagnostic process allows for early identification of potential problems, preventing more significant issues and costly repairs down the line. By understanding tire wear patterns, pressure requirements, and potential underlying mechanical problems, you can ensure your tires remain in optimal condition, contributing to both your safety and the longevity of your vehicle. Remember, proactive maintenance is key to a smooth and safe driving experience.