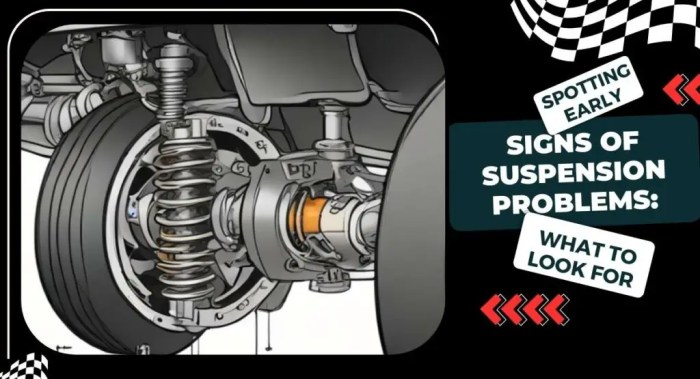
A smoothly functioning suspension system is crucial for a safe and comfortable driving experience. Ignoring suspension problems can lead to decreased vehicle control, uneven tire wear, and even accidents. This guide provides a straightforward, step-by-step approach to diagnosing potential issues, empowering you to identify problems early and seek timely professional assistance.
Understanding your car’s suspension is key to preventative maintenance. By learning to identify common symptoms, you can avoid costly repairs down the line. This process involves a combination of visual inspection, simple tests, and attention to driving dynamics, all explained clearly in the following steps.
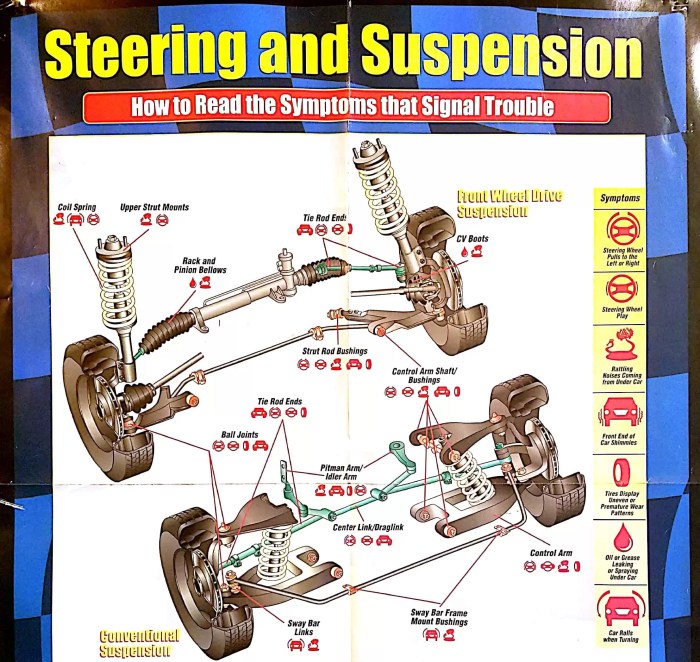
Visual Inspection and Initial Assessment
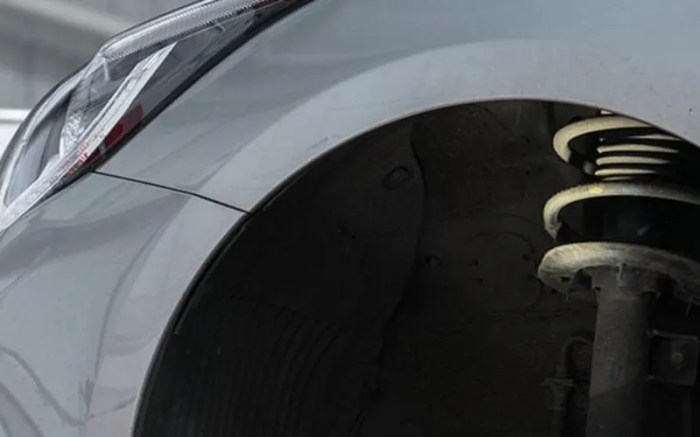
A visual inspection is the first and often most crucial step in diagnosing suspension problems. It allows you to identify readily apparent issues and determine the severity of the problem before undertaking more complex diagnostic procedures. This initial assessment can significantly inform your subsequent steps and help prioritize repairs.
By carefully examining your vehicle’s suspension components, you can often pinpoint the source of noises, poor handling, or uneven tire wear. This approach saves time and money by focusing your efforts on the most likely culprits.
Common Visual Indicators of Suspension Problems
Several visual cues can indicate problems within your vehicle’s suspension system. The following table summarizes some common issues, their visual indicators, severity levels, and potential causes. Remember that the severity can vary depending on the extent of the damage and its impact on vehicle handling and safety.
| Problem | Visual Cue | Severity Level | Potential Causes |
|---|---|---|---|
| Leaking Shocks/Struts | Fluid stains or corrosion around shock/strut shafts; noticeable oil on the shock body | Medium to High | Worn seals, damaged shock body, age, excessive use |
| Broken or Sagging Springs | Visible cracks, broken coils, or one side of the vehicle sitting lower than the other | High | Rust, fatigue, overloading, impact damage |
| Bent Control Arms | Misalignment of wheels, noticeable bends or damage to the control arm itself | High | Impact from potholes or collisions |
| Worn Ball Joints | Excessive play or movement in the ball joint; clicking or popping sounds when turning | Medium to High | Wear and tear, impact damage, lack of lubrication |
| Torn or Damaged Boots (on ball joints, tie rod ends) | Ripped or missing rubber boots protecting the joint; visible dirt or debris inside the joint | Medium | Age, impact damage, debris |
Safe Inspection Procedure
Safety is paramount when inspecting your vehicle’s suspension. Always follow these steps to minimize the risk of injury:
- Park on a level, stable surface, engage the parking brake, and chock the wheels (place wheel chocks behind the wheels to prevent rolling).
- Use jack stands to support the vehicle securely after lifting it with a jack. Never rely solely on a jack to support the vehicle’s weight.
- Locate the vehicle’s designated jack points (consult your owner’s manual). These points are reinforced areas designed to withstand the stress of lifting.
- Wear appropriate safety gear, including gloves and eye protection.
- Inspect each suspension component carefully, looking for any signs of damage, wear, or leaks. Pay close attention to the areas mentioned in the table above.
- If you are unsure about any component, consult a qualified mechanic.
Tools Needed for Basic Visual Inspection
A basic visual inspection requires minimal tools. Having the right tools makes the process easier and safer.
- Jack and jack stands (essential for safe lifting)
- Wheel chocks
- Gloves
- Flashlight (to illuminate hard-to-see areas)
- Owner’s manual (for jack points and component locations)
Bounce Test and Steering Wheel Check
This section details how to perform a simple bounce test to assess the condition of your vehicle’s shock absorbers and how to check the steering wheel for play, both of which can indicate underlying suspension problems. These tests provide valuable insights into the overall health of your car’s suspension system, complementing the visual inspection already performed.
Performing the bounce test and checking the steering wheel for play are quick and straightforward methods to assess the functionality of your car’s shock absorbers and steering components. These tests can help pinpoint potential problems before they escalate into more significant and costly repairs.
Bounce Test Procedure
To perform the bounce test, firmly press down on one corner of the vehicle’s bumper, then release. Observe how the vehicle responds. A healthy suspension system will exhibit a slight dampened oscillation, returning to its resting position relatively quickly. The vehicle might bounce once or twice before settling. Conversely, a faulty suspension system will exhibit excessive bouncing or a slow return to its resting position. This indicates worn or damaged shock absorbers which are no longer effectively dampening the suspension’s movement. Repeating this test on each corner of the vehicle allows for a comprehensive assessment.
Steering Wheel Play Check
To check for play in the steering wheel, firmly grasp the wheel at the 9 and 3 o’clock positions. Gently try to move the wheel back and forth, and from side to side. A minimal amount of play is normal, but excessive movement indicates potential problems with the steering components, including those within the suspension system. Loose or worn suspension components, such as ball joints or tie rod ends, can contribute to noticeable play in the steering wheel, resulting in a vague or imprecise steering feel. This looseness can impact vehicle handling and responsiveness, making it more difficult to control the vehicle, especially at higher speeds or during emergency maneuvers.
Comparison of Bounce Test Results for Different Suspension Problems
The bounce test results can vary depending on the specific suspension component that is failing. For instance, worn shock absorbers will typically result in excessive bouncing, with the vehicle taking several oscillations to settle. Conversely, broken or severely weakened springs will often lead to a noticeable sag in the vehicle’s ride height, and the bounce test might reveal an uneven settling across different corners of the vehicle. The vehicle might also bounce with significantly less dampening than normal, even if the shock absorbers are still functioning. The combination of these observations helps to pinpoint the source of the suspension issue more accurately.
Driving Test and Maneuvering Checks

A thorough driving test is crucial for identifying subtle suspension problems that might not be apparent during a static inspection. This involves driving on various road surfaces and performing specific maneuvers to stress the suspension system and reveal any weaknesses. Pay close attention to the vehicle’s handling and any unusual sounds or vibrations.
Driving on different road surfaces allows you to assess the suspension’s ability to absorb impacts and maintain stability. Specific maneuvers, such as sharp turns and hard braking, will further highlight any issues with the suspension components.
Test Route Design and Maneuvers
To effectively diagnose suspension problems, design a test route incorporating a variety of road conditions and maneuvers. Begin with a smooth, straight section of road to establish a baseline. Then, incorporate a section with noticeable potholes or uneven pavement. This is followed by a series of sharp turns, both left and right, at moderate speed. Finally, include a section where you can perform several hard braking maneuvers from a moderate speed. Note any unusual behaviors during each phase. For example, excessive bouncing after hitting a pothole suggests worn shock absorbers or struts. A pulling sensation during braking could indicate problems with the suspension components on one side of the vehicle. Poor handling during sharp turns might point to worn suspension bushings or ball joints.
Unusual Tire Wear Patterns and Their Indications
Uneven tire wear is a strong indicator of suspension problems. The way a tire wears down reflects the forces acting upon it, and inconsistencies often reveal underlying mechanical issues.
| Tire Wear Pattern | Likely Cause | Severity | Recommended Action |
|---|---|---|---|
| One-sided wear (one side of the tire is significantly more worn than the other) | Misaligned wheels, worn suspension components (ball joints, control arm bushings), or a damaged tie rod. | Moderate to Severe | Wheel alignment check, suspension component inspection and replacement as needed. |
| Feathering (a slight edge wear along the tire’s circumference) | Improper wheel alignment or worn suspension components. | Moderate | Wheel alignment check, suspension component inspection and replacement as needed. |
| Cupping (scalloped wear pattern) | Worn shock absorbers or struts, unbalanced wheels, or improper tire inflation. | Moderate | Inspect and replace worn shock absorbers/struts, balance wheels, check tire pressure. |
| Center wear (excessive wear in the center of the tire) | Overinflation. | Mild | Adjust tire pressure to the manufacturer’s recommendation. |
Suspension Sounds and Their Significance
Different sounds emanating from the suspension system can pinpoint specific problem areas. These sounds often vary depending on the severity of the damage and the type of component affected.
A knocking sound, especially when going over bumps, often indicates worn ball joints, control arm bushings, or shock absorbers. A clunking sound might suggest loose components, worn suspension bushings, or a problem with the strut mounts. Squeaking noises typically indicate dry or worn bushings, which need lubrication or replacement. A grinding sound, however, is a serious issue, suggesting metal-on-metal contact and requiring immediate attention. Ignoring these sounds can lead to more significant damage and potentially dangerous driving conditions.
Last Word
Successfully diagnosing your car’s suspension problems requires a methodical approach. By carefully following the steps Artikeld above – from visual inspection to road testing – you can effectively pinpoint potential issues. Remember, while this guide provides valuable insights, professional assessment by a qualified mechanic is always recommended for definitive diagnosis and repair. Early detection and prompt action are crucial for maintaining your vehicle’s safety and longevity.