Safe braking is paramount for every driver. Understanding your car’s braking system is crucial, not only for preventing accidents but also for maintaining your vehicle’s overall health. This guide provides a straightforward, seven-step process to help you diagnose potential brake issues, empowering you to address problems before they escalate into costly repairs or dangerous situations. We’ll cover everything from identifying common symptoms to performing basic checks and understanding when professional help is needed.
From the subtle squeal of worn brake pads to the alarming sponginess of the brake pedal, this guide will equip you with the knowledge to pinpoint the source of the problem. We’ll explore visual inspections, functional tests, and troubleshooting techniques, offering clear explanations and practical advice throughout. Remember, early detection is key to preventing more significant and expensive repairs down the line.
Identifying Brake System Issues

Understanding your car’s braking system is crucial for safety. Ignoring warning signs can lead to dangerous situations. This section details common brake problems, how to spot them, and what to check.
Many brake problems manifest through noticeable symptoms. Early detection is key to preventing more serious, and potentially costly, repairs. Recognizing these issues promptly can save you from an accident and expensive repairs down the line.
Common Brake Problem Symptoms
Several symptoms indicate potential brake problems. These range from subtle noises to significant performance changes. Recognizing these signs is the first step in diagnosing the issue.
| Problem | Symptom | Potential Cause | Example |
|---|---|---|---|
| Worn Brake Pads | Squealing or grinding noise when braking | Thin or worn-out brake pads; metal-on-metal contact | A high-pitched squeal when lightly braking, progressing to a grinding sound as the pads wear further. |
| Worn Rotors | Grinding or pulsating brake pedal | Grooved, warped, or excessively worn brake rotors | A noticeable vibration or pulsation in the brake pedal, especially at higher speeds. |
| Low Brake Fluid | Spongy or soft brake pedal | Leak in the brake system; fluid level below minimum | The brake pedal feels unusually soft or sinks to the floor when pressed. |
| Faulty Caliper | Pulling to one side when braking | Seized or sticking caliper piston; uneven brake pad wear | The vehicle pulls noticeably to the left or right when the brakes are applied. |
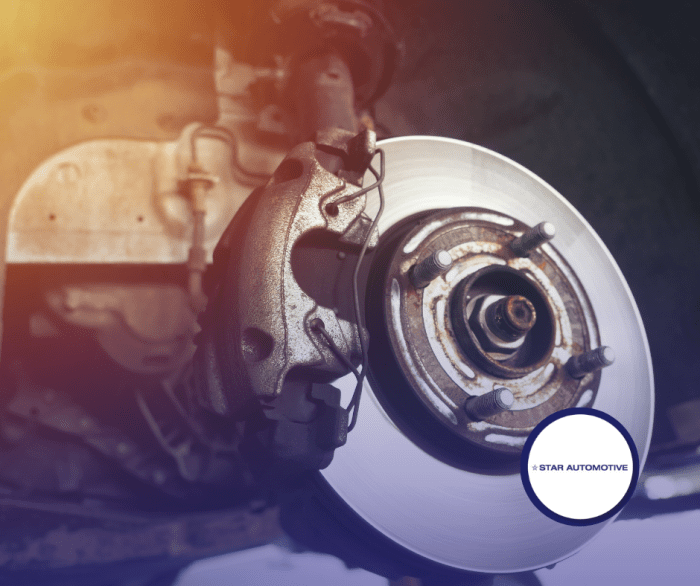
Visual Inspection of Brake Components
A visual inspection is a crucial first step in diagnosing brake problems. This allows you to assess the condition of key components and identify potential issues before they become serious.
- Inspect Brake Pads: Carefully examine the brake pads for thickness. Replace them if the pad material is less than 1/4 inch thick. Look for uneven wear, which might indicate a caliper problem.
- Inspect Brake Rotors: Check the rotors for scoring, grooves, or excessive wear. Excessive wear or warping can cause vibrations during braking. Look for any significant discoloration or pitting.
- Inspect Brake Calipers: Ensure the calipers move freely and don’t appear seized or stuck. A seized caliper can cause uneven brake pad wear and pulling during braking. Look for any signs of leaks or damage.
Brake Fluid Level and Condition Check
Maintaining the correct brake fluid level and condition is vital for safe braking. Low fluid levels or contaminated fluid can severely compromise braking performance.
The following flowchart illustrates the process:
Flowchart: Checking Brake Fluid
Start –> Locate Brake Fluid Reservoir (usually a clear plastic container) –> Check Fluid Level (should be between minimum and maximum lines) –> Is fluid level low? Yes –> Top off with correct DOT-rated fluid (consult owner’s manual) –> No –> Check Fluid Condition (look for discoloration, cloudiness, or contamination) –> Is fluid contaminated? Yes –> Flush and bleed brake system –> No –> End
Testing Brake System Functionality

Assessing your brake system’s functionality involves more than just stepping on the pedal. A thorough check ensures your safety and helps pinpoint potential problems before they become serious hazards. This section details methods for evaluating brake pedal feel, performing a simple bleed, and understanding the symptoms of various brake system failures.
Testing brake pedal feel and responsiveness provides valuable insight into the overall health of your braking system. A firm, consistent pedal that stops the vehicle predictably indicates a healthy system. Conversely, a soft, spongy pedal, or one that travels too far before engaging the brakes, suggests air in the lines or a problem with the master cylinder. A hard pedal, requiring excessive force, might point to a problem with the booster or other components. To test, apply gradual and then firm pressure to the brake pedal, noting the distance it travels before braking action begins, and the overall feel (spongy, firm, hard). Compare this to your experience with other vehicles to get a better sense of what’s normal.
Brake Bleeding Procedure
Air in the brake lines can significantly compromise braking performance, leading to a spongy pedal and reduced stopping power. Bleeding the brakes removes this air, restoring optimal functionality. This process requires two people: one to pump the brake pedal and another to open and close the bleeder valves. Improper bleeding can lead to further complications, so it’s recommended to consult a repair manual specific to your vehicle.
- Gather Supplies: You’ll need a wrench that fits your bleeder valves, a clear tube to collect brake fluid, a container to catch the fluid, and fresh brake fluid appropriate for your vehicle.
- Locate Bleeder Valves: These are typically located on the brake calipers at each wheel. Consult your vehicle’s repair manual for their precise locations.
- Position the Container: Place the container under the bleeder valve to collect the old brake fluid.
- Attach the Tube: Securely attach one end of the clear tube to the bleeder valve and submerge the other end in the container.
- Pump and Bleed: Have someone firmly press and hold the brake pedal. Then, carefully open the bleeder valve for a few seconds, allowing air and old fluid to escape. Close the valve before the pedal is released. Repeat this process several times for each wheel, ensuring a steady stream of clean brake fluid emerges from the tube.
- Check Fluid Level: Regularly monitor the brake fluid reservoir and add fresh fluid as needed to maintain the proper level.
- Test Brakes: After bleeding all four wheels, test the brakes thoroughly in a safe area before driving.
Symptoms of Brake System Failures
Different brake system failures manifest with unique symptoms. Recognizing these symptoms is crucial for prompt diagnosis and repair, preventing potentially dangerous situations.
| Component | Symptoms |
|---|---|
| Master Cylinder | Spongy or soft brake pedal, gradual loss of braking power, brake pedal going to the floor. |
| ABS (Anti-lock Braking System) | ABS warning light illuminates, pulsating or vibrating brake pedal during hard braking, reduced braking effectiveness in some conditions (though the brakes will still function). The ABS system itself may fail, but the regular brakes should still function. |
| Brake Calipers | Dragging brakes (one wheel warmer than others), uneven braking, pulling to one side during braking. This can be caused by seized pistons within the caliper. |
| Brake Lines/Hoses | Spongy brake pedal, brake fluid leaks, sudden loss of braking power. A leak in a brake line is extremely dangerous. |
Addressing and Troubleshooting Brake Problems
Once you’ve identified potential brake system issues through inspection and testing, it’s time to address them. This involves understanding the common problems, selecting appropriate repair solutions, and safely performing the necessary work or seeking professional assistance. Remember, brake safety is paramount; if unsure about any step, consult a qualified mechanic.
Brake Repair Solutions
Choosing the correct repair method depends entirely on the specific problem identified during your inspection. The following table Artikels common brake problems and their corresponding solutions. Always refer to your vehicle’s repair manual for specific instructions and torque specifications.
| Problem | Solution | Tools Required | Safety Precautions |
|---|---|---|---|
| Worn Brake Pads | Replace brake pads. | Socket set, wrench, caliper piston compressor, brake cleaner. | Always wear safety glasses and gloves. Ensure the vehicle is properly secured on jack stands. |
| Warped or Scratched Rotors | Resurface rotors (if possible) or replace rotors. | Rotor lathe (for resurfacing), socket set, wrench, caliper removal tool. | Use appropriate safety equipment, including a face shield if using a lathe. |
| Faulty Brake Calipers | Replace brake calipers. | Socket set, wrench, brake line wrench, caliper bracket bolts. | Bleed the brake system after replacing calipers to remove air bubbles. |
| Leaking Brake Fluid | Locate and repair leaks; replace damaged components (e.g., brake lines, hoses). | Wrench set, brake fluid, brake line flaring tool (if replacing lines). | Brake fluid is corrosive; use gloves and eye protection. Properly dispose of used brake fluid. |
Safely Jacking Up a Car and Removing a Wheel
Before attempting any brake work, it’s crucial to safely jack up your vehicle and remove the wheel. Improper jacking can lead to serious injury.
- Engage the parking brake firmly.
- Locate the vehicle’s jack points (consult your owner’s manual). Never jack up the car on flimsy parts like the bumper or rocker panels.
- Position the jack securely under the designated jack point.
- Slowly raise the vehicle until the wheel is off the ground. Use jack stands to support the vehicle’s weight; never rely solely on the jack.
- Use a lug wrench to loosen the lug nuts before fully lifting the car. Turn counterclockwise.
- Remove the wheel.
Choosing Replacement Brake Parts
Selecting the correct replacement parts is critical for brake system performance and safety. Always prioritize quality parts from reputable manufacturers.
- Vehicle Make and Model: Brake components are vehicle-specific. Using incorrect parts can compromise safety and performance.
- Driving Conditions: If you frequently drive in mountainous areas or harsh conditions, consider high-performance brake pads designed for increased stopping power and heat resistance.
- Driving Style: Aggressive driving may necessitate more frequent brake pad replacements.
- OEM vs. Aftermarket Parts: Original Equipment Manufacturer (OEM) parts are manufactured to the vehicle manufacturer’s specifications, often at a higher price. Aftermarket parts can offer comparable quality at a lower cost, but always check reviews and ratings before purchasing.
Conclusion

By systematically following these seven steps, you can significantly improve your ability to diagnose and potentially resolve your car’s brake problems. While some repairs require professional expertise, understanding the basics allows for proactive maintenance and informed decision-making. Remember that safety is paramount; if you’re unsure about any step, it’s always best to consult a qualified mechanic. Proactive maintenance will not only save you money but also ensure your safety on the road.