A leaky roof can be a homeowner’s worst nightmare, causing water damage, structural issues, and significant financial burdens. Understanding how to effectively diagnose and repair a leak is crucial for preventing further damage and maintaining the integrity of your home. This guide provides a seven-step process to tackle this common problem, from identifying the source of the leak to implementing effective repairs, empowering you to take control of the situation and safeguard your property.
We’ll explore various methods for leak detection, from simple visual inspections to more advanced techniques like infrared thermal imaging. We’ll then delve into the practical aspects of repairing common leak types, addressing minor shingle damage, patching holes in roofing membranes, and sealing cracks in flashing. For more complex issues, we’ll discuss strategies for replacing damaged roofing sections and repairing roof valleys. Finally, we’ll examine the importance of proper gutter maintenance and the selection of durable roofing materials to prevent future leaks.
Identifying the Leak Source

Pinpointing the exact source of a roof leak is crucial for effective repairs. A systematic approach, combining visual inspection with more advanced techniques, significantly increases the chances of a successful fix. Ignoring even small leaks can lead to significant structural damage and costly repairs down the line.
Visual Inspection for Leak Detection
A thorough visual inspection is the first and often most effective step. Start by examining the interior of your home, looking for water stains on ceilings or walls. These stains often indicate the general area of the leak, but not necessarily the precise point of entry. Pay close attention to discoloration, bubbling paint, or areas of dampness. Next, carefully inspect the roof itself from the ground, using binoculars if necessary. Look for missing or damaged shingles, cracked flashing around chimneys or vents, and any signs of deteriorated roofing materials. Remember to check gutters and downspouts for blockages that might be causing water to back up and leak into the roof.
Using a Garden Hose to Locate Leaks
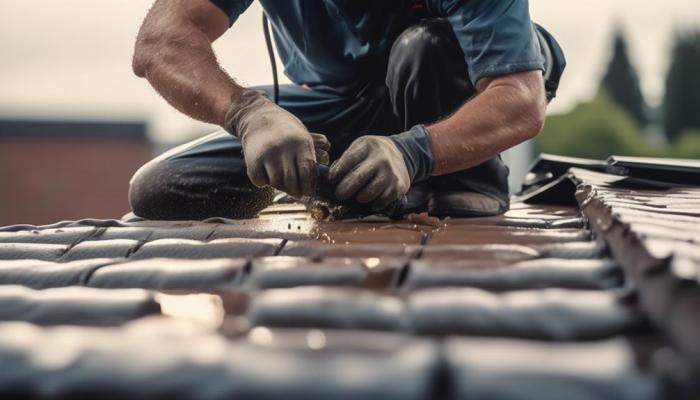
If the visual inspection doesn’t pinpoint the leak, a garden hose test can be very helpful. This method involves carefully directing a stream of water onto suspected areas of the roof while someone inside observes for water penetration. Before beginning, ensure that you have a helper inside to communicate the location of any water penetration. It’s essential to use low water pressure to avoid causing further damage. Protect yourself by wearing appropriate footwear and ensuring a stable footing. Start by testing the areas that showed the most significant signs of water damage during the initial visual inspection. Systematically work your way across suspected areas, carefully monitoring the interior for leaks.
Infrared Camera Use for Leak Detection
Infrared cameras offer a non-invasive method for detecting hidden moisture within roof structures. These cameras detect temperature differences, with damp areas appearing cooler than dry areas. This allows for the identification of leaks even before visible signs of damage appear. However, infrared cameras are more expensive than other methods and require some level of expertise to interpret the results accurately. Factors like ambient temperature and the thickness of the roofing material can affect the accuracy of the readings. Despite these limitations, infrared cameras are valuable tools for identifying hidden moisture problems that could otherwise go undetected until significant damage has occurred. For example, an infrared scan could reveal moisture trapped within a wall cavity caused by a leak from a poorly sealed chimney flashing, even if no visible water stains are present on the interior walls.
Comparison of Leak Detection Methods
| Method | Effectiveness | Cost | Limitations |
|---|---|---|---|
| Visual Inspection | High for easily visible leaks; low for hidden leaks | Low | Ineffective for hidden leaks; requires good access to the roof |
| Garden Hose Test | Moderate; effective for pinpointing leaks in accessible areas | Low | Requires good weather; can be time-consuming; may not detect hidden leaks |
| Infrared Camera | High; detects hidden moisture | High | Requires specialized equipment and expertise; can be affected by environmental factors |
Repairing Common Leak Types

Addressing leaks effectively requires understanding the different types of roof damage and employing appropriate repair techniques. This section details common repair methods for various roofing materials, emphasizing the importance of proper material selection and meticulous execution to ensure a long-lasting and effective solution.
Minor Shingle Damage Repair
Minor shingle damage, such as cracks, curling, or missing granules, can often be addressed with relatively simple repairs. These repairs prevent further water ingress and extend the lifespan of your roof. The process involves carefully removing damaged shingles, applying appropriate adhesive, and securing replacement shingles. Materials needed include replacement shingles matching your existing roof, roofing cement, a utility knife, and a pry bar. The steps involve identifying the damaged area, carefully removing the affected shingle(s) without causing further damage to surrounding shingles, cleaning the area, applying roofing cement to the underside of the replacement shingle, and firmly pressing it into place. Allow the cement to cure completely before proceeding.
Patching Holes in Roofing Membranes
Patching holes in roofing membranes, common in flat roofs, requires a different approach depending on the membrane type. EPDM (ethylene propylene diene monomer) membranes, for example, can be patched using EPDM repair patches and a strong adhesive specifically designed for EPDM. TPO (thermoplastic polyolefin) membranes may require a similar approach, using TPO-specific patches and adhesive. For built-up roofing (BUR), hot asphalt may be necessary to properly adhere patches. Regardless of the membrane type, proper surface preparation is crucial. This includes cleaning the area around the hole, ensuring it is dry, and removing any loose or damaged membrane. The patch should be slightly larger than the hole to ensure complete coverage. After applying adhesive, firmly press the patch in place and allow ample time for curing.
Sealing Cracks in Flashing
Flashing, the metal or other material used to seal areas where the roof meets other structures like chimneys and vents, is crucial for preventing leaks. Cracks in flashing can allow water penetration. Repairing these cracks involves cleaning the area thoroughly, removing any loose or damaged flashing, and applying a high-quality sealant designed for roofing applications. The sealant should be compatible with both the flashing material and the roofing material. Silicone-based sealants are often preferred for their durability and water resistance. Applying the sealant in a neat and even bead, ensuring complete coverage of the crack, is essential. Allow the sealant to cure fully according to the manufacturer’s instructions. Proper sealant selection is paramount; using an inappropriate sealant could lead to premature failure and recurring leaks.
Tools and Materials for Common Roof Repairs
Proper tools and materials are essential for successful roof repairs. The specific requirements vary depending on the type of repair, but some common items include:
- Utility knife
- Pry bar
- Roofing cement
- Replacement shingles (for shingle repair)
- EPDM or TPO patches and adhesive (for membrane repair)
- Hot asphalt (for BUR repair)
- High-quality roofing sealant (for flashing repair)
- Safety harness and rope (for working at heights)
- Ladder
- Brush or scraper for cleaning surfaces
Addressing More Complex Issues
Repairing more extensive roof damage requires specialized knowledge and often involves replacing sections of the roof or addressing complex structural elements. This section details the processes involved in tackling these more challenging roofing repairs. Proper techniques are crucial to ensure a long-lasting and leak-free roof.
Replacing Damaged Roofing Sections
Replacing damaged roofing sections necessitates careful removal of the affected area, proper installation of underlayment, and accurate shingle application. Begin by removing the damaged shingles and underlying materials, ensuring a clean and level surface for the new materials. Underlayment, a waterproof membrane, is then installed, overlapping edges to prevent water penetration. Finally, new shingles are applied, adhering strictly to the manufacturer’s instructions regarding overlap and nail placement. This process ensures a seamless integration of the new section with the existing roof. For example, replacing a section damaged by a fallen tree branch would involve these steps, ensuring the surrounding shingles are also checked for damage.
Repairing Damaged Roof Valleys
Roof valleys, where two roof slopes meet, are particularly vulnerable to leaks. Damage can manifest as cracked flashing, deteriorated sealant, or missing shingles. Repair methods vary depending on the type and extent of damage. For minor cracks in flashing, sealant can be applied. More extensive damage may require replacing the entire valley flashing, involving careful removal of the old flashing, installation of new flashing, and sealing all joints. Open valleys, where the shingles meet without flashing, may require installing metal flashing and sealing it properly. A common example of valley damage is caused by years of water runoff accumulating debris and causing deterioration.
Repairing Gutter and Downspout Issues
Properly functioning gutters and downspouts are crucial for diverting water away from the roof and foundation. Clogged gutters can lead to water overflowing and damaging the roof. Downspouts that are detached or improperly positioned can direct water towards the house, causing leaks. Cleaning gutters regularly is essential. Repairing or replacing damaged sections of gutters or downspouts involves using appropriate sealant or joining sections. Ensuring proper gutter slope (a slight downward incline towards downspouts) is vital for effective drainage. Improper slope can cause water to pool, leading to leaks. A diagram illustrating proper gutter slope and downspout placement would show a consistent downward angle from the roofline to the downspout, with the downspout leading water away from the foundation. For example, a downspout directed towards the house’s foundation would require repositioning to prevent water damage.
Roofing Material Comparison
| Material | Lifespan (Years) | Leak Resistance | Cost (per square) |
|---|---|---|---|
| Asphalt Shingles | 15-30 | Moderate | $80-$200 |
| Wood Shakes | 30-50 | Moderate to High (with proper maintenance) | $200-$500 |
| Tile (Clay or Concrete) | 50-100+ | High | $300-$800 |
| Metal (Steel or Aluminum) | 50-75+ | High | $250-$600 |
Ultimate Conclusion
Successfully diagnosing and repairing a leaky roof requires a systematic approach, combining careful observation, appropriate tools, and a sound understanding of roofing principles. By following the seven steps Artikeld in this guide, homeowners can effectively address leaks, preventing further damage and ensuring the longevity of their roofs. Remember, addressing a leak promptly is key to minimizing costs and preventing more extensive repairs down the line. With the right knowledge and techniques, you can confidently tackle this common household challenge.