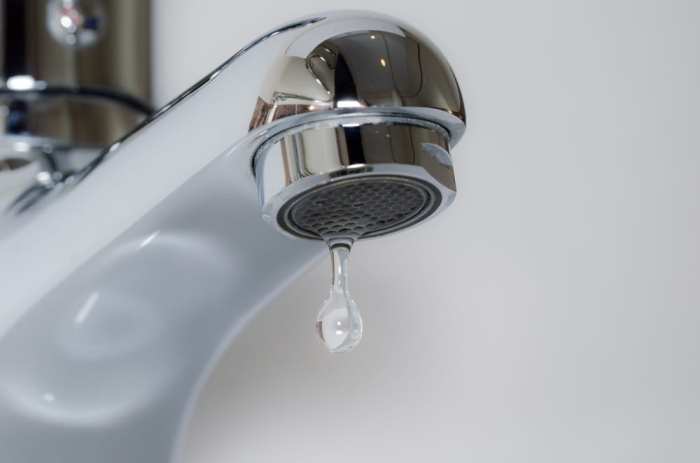
A dripping faucet, seemingly insignificant, can waste gallons of water and drive you mad with its incessant rhythm. This seemingly minor household issue can quickly escalate into a costly problem if left unaddressed. Understanding the root cause is the first step towards a quick and efficient fix, saving you both money and frustration. This guide provides a clear, step-by-step approach to diagnosing the source of your leaky faucet and getting it back to a state of silent functionality.
We’ll cover everything from identifying the type of leak and gathering the necessary tools, to the actual repair process for various faucet types. Whether you’re a seasoned DIY enthusiast or a complete novice, this guide empowers you to tackle this common household problem with confidence and competence. Let’s turn that annoying drip into a satisfying silence.
Identifying the Leak Source
Pinpointing the exact source of a leaky faucet is the crucial first step in any repair. Understanding the different types of leaks and where they commonly originate will significantly speed up the diagnosis and repair process. A systematic visual inspection is key to this process.
Different Types of Faucet Leaks and Their Visual Characteristics
Faucet Leak Types
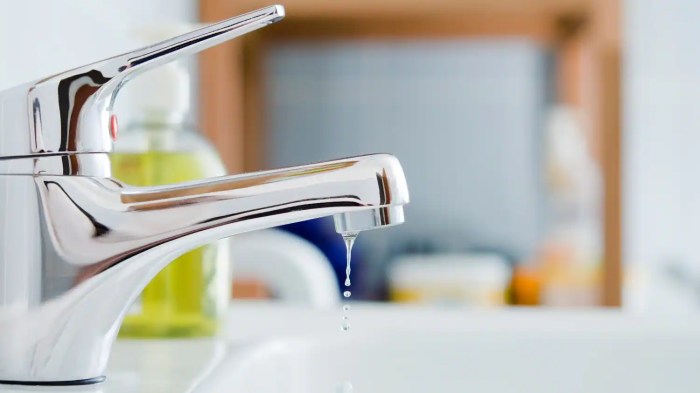
Leaks manifest in various ways, each indicating a different potential problem. A slow, consistent drip suggests a minor issue, often stemming from a worn-out washer or O-ring. A steady stream, on the other hand, points to a more significant problem, potentially a damaged valve cartridge or a crack in the faucet body. A leak that only occurs when the faucet is turned on usually indicates a problem with the valve itself, while a leak from the base of the faucet suggests a problem with the connection to the supply lines.
Visual Inspection Flowchart
The following steps will guide a visual inspection to identify the leak’s origin:

*(Note: A flowchart would be included here. It would start with “Is the leak present with the faucet off?”, branching to “Check for leaks around the faucet base” if yes and “Check for internal leaks” if no. The “Check for leaks around the faucet base” branch would then lead to “Check O-rings and connections” and “Check for cracks in the faucet body”. The “Check for internal leaks” branch would lead to “Check the cartridge/valve” and “Check the faucet spout”. Each step would be represented by a box in the flowchart.)*
The flowchart illustrates a systematic approach, ensuring all potential leak points are checked. It emphasizes the importance of checking the faucet both with the water running and off.
Common Faucet Parts That Leak
Several components within a faucet are prone to failure and leakage.
*(Note: An image of a faucet O-ring would be included here. The description would read: “O-Ring: A small rubber ring that seals the valve stem. Deterioration or damage to this ring leads to leaks around the handle.)*
*(Note: An image of a faucet washer would be included here. The description would read: “Washer: Located at the end of the valve stem, it seals the water flow when the faucet is turned off. Wear and tear or damage cause dripping leaks.)*
*(Note: An image of a faucet cartridge would be included here. The description would read: “Cartridge: The internal mechanism that controls water flow. A worn-out or damaged cartridge can cause a steady stream leak.)*
*(Note: An image of a cracked faucet body would be included here. The description would read: “Cracked Faucet Body: A crack in the faucet body, often caused by impact or corrosion, can lead to leaks at various points.)*
Using Visual Inspection Tools
Employing simple tools can significantly enhance the accuracy of your visual inspection.
A flashlight illuminates hard-to-see areas, revealing small cracks or leaks that might otherwise be missed. A magnifying glass allows for a closer examination of worn-out parts like O-rings and washers, helping identify even minor damage. Using these tools in conjunction with the flowchart significantly improves the chances of quickly and accurately identifying the source of the leak.
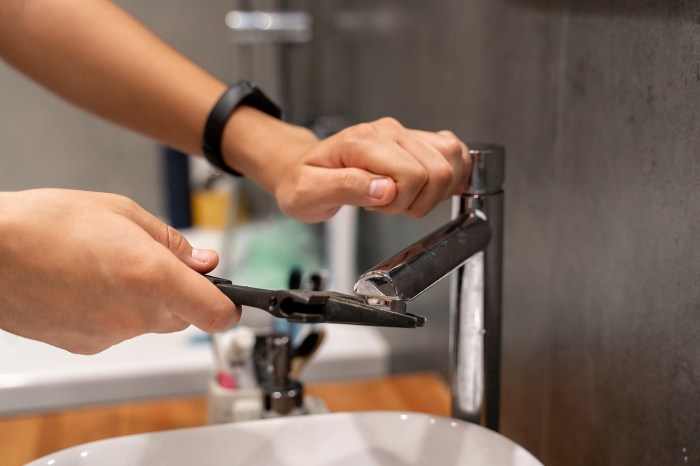
Gathering Necessary Tools and Materials
Successfully repairing a leaky faucet requires the right tools and replacement parts. Having these items readily available will streamline the process and prevent unnecessary delays. Proper preparation is key to a quick and efficient repair.
Before beginning any faucet repair, it’s crucial to gather the necessary tools and replacement parts. This will ensure a smooth and efficient repair process. Failing to have the correct tools on hand can lead to frustration and potentially prolong the repair time.
Essential Tools for Faucet Repair
A well-equipped toolbox will significantly aid in the faucet repair process. The specific tools required may vary slightly depending on the type of faucet, but the following list covers the most common necessities.
- Screwdrivers: Phillips head and flathead screwdrivers in various sizes (small, medium, and large). These are essential for removing faucet handles and other components.
- Adjustable Wrench: An adjustable wrench (crescent wrench) is invaluable for loosening and tightening nuts and other fittings.
- Basin Wrench: A basin wrench provides access to difficult-to-reach nuts under the sink.
- Pliers: Needle-nose pliers are useful for gripping small parts, while slip-joint pliers offer more versatility.
- Channel-Lock Pliers: These are especially helpful for gripping stubborn nuts and fittings.
- Putty Knife: A putty knife can help remove old caulk or sealant around the faucet base.
- Cloth Rags: Keep several clean rags on hand to wipe up spills and clean parts.
- Flashlight: A flashlight can help illuminate dark areas under the sink.
- Safety Glasses: Always wear safety glasses to protect your eyes from debris.
Faucet Parts Comparison
Selecting the correct replacement parts is crucial for a successful repair. The table below compares common faucet components. Choosing the wrong part can lead to continued leaks or even damage to the faucet.
| Part | Type | Features | Applications |
|---|---|---|---|
| Washer | Rubber, Neoprene, Silicone | Various sizes and thicknesses; rubber is common, neoprene and silicone are more durable. | Compression faucets; seals the water flow. |
| O-Ring | Rubber, Buna-N | Small, circular seals; various sizes and thicknesses. | Various faucet types; seals connections between components. |
| Cartridge | Ceramic, Plastic | Contains internal components controlling hot and cold water flow; varies greatly by manufacturer and faucet model. | Cartridge faucets; the main internal control mechanism. |
Selecting Replacement Parts
The type of replacement part needed depends heavily on the faucet’s type and the source of the leak. Carefully examine the leaking faucet to identify the faulty component before purchasing replacements. For instance, a dripping faucet might require only a simple washer replacement, while a cartridge faucet with a persistent leak will necessitate a new cartridge.
Disconnecting the Water Supply
Before starting any repairs, it is essential to safely disconnect the water supply to the faucet. This prevents water damage during the repair process. Failure to do so can lead to flooding and significant water damage.
- Locate the shut-off valves under the sink. These are usually located on the water supply lines leading to the faucet.
- Turn the shut-off valves clockwise to completely close them. This will stop the water flow to the faucet.
- Turn on the faucet to relieve any remaining water pressure in the lines.
Repairing the Leaky Faucet
Repairing a leaky faucet often involves replacing worn parts. The specific process depends on the type of faucet you have. Common types include compression, cartridge, and ball faucets, each requiring a slightly different approach. This section details the repair process for each, focusing on replacing worn washers and cartridges, and providing guidance on lubrication and reassembly to prevent future leaks.
Replacing a Worn Faucet Washer
Replacing a worn washer is a common repair for compression faucets. These faucets use separate hot and cold handles, each controlling a separate valve. A washer, located at the end of the valve stem, seals the water flow. Over time, these washers wear down, leading to leaks.
- Turn off the water supply: Locate the shut-off valves under the sink for both hot and cold water lines. Turn them clockwise to stop the water flow.
- Remove the handle: Most handles are secured by a setscrew. Use a small screwdriver to loosen and remove this screw. Carefully remove the handle.
- Remove the packing nut: This nut is located beneath the handle. Unscrew it counterclockwise using an appropriate wrench. Be careful not to damage the valve stem.
- Remove the stem: Once the packing nut is removed, the stem should pull out relatively easily. Note the orientation of any components before removal to facilitate reassembly.
- Replace the washer: The washer is located at the bottom of the stem. Carefully remove the old washer and replace it with a new one of the correct size and type.
- Reassemble the faucet: Carefully reverse the steps above, ensuring all parts are correctly aligned. Tighten the packing nut securely, but avoid over-tightening.
- Turn on the water supply: Slowly turn the water supply valves counterclockwise to check for leaks.
Imagine the washer as a small rubber disc. The old, worn washer might be cracked, deformed, or significantly thinner than a new one. Replacing it with a fresh, correctly sized washer ensures a proper seal.
Repairing Different Faucet Types
While replacing a washer is common for compression faucets, cartridge and ball faucets require different approaches.
| Faucet Type | Repair Process |
|---|---|
| Compression | Replace worn washers on individual stems. |
| Cartridge | Replace the entire cartridge assembly. |
| Ball | Replace the ball, springs, and seats within the faucet body. |
Each faucet type has its unique internal mechanism. Understanding the specific components is crucial for effective repair.
Replacing a Leaking Cartridge
Cartridge faucets use a single cartridge containing all the internal parts. Replacing a leaking cartridge is generally straightforward.
- Turn off the water supply: As with washer replacement, turn off the water supply valves under the sink.
- Remove the handle(s): This usually involves removing a setscrew or cap on top of the handle.
- Remove the retaining clip or nut: This secures the cartridge in place. The method varies depending on the faucet model. Carefully remove this component.
- Remove the cartridge: The cartridge should now pull out. Note its orientation and any markings for correct reinstallation.
- Install the new cartridge: Insert the new cartridge, ensuring it’s correctly aligned. Push it firmly into place.
- Reassemble the faucet: Replace the retaining clip or nut, handle(s), and turn the water supply back on.
Troubleshooting: If the leak persists after cartridge replacement, ensure the new cartridge is correctly seated and that the retaining clip or nut is securely tightened. A faulty O-ring on the cartridge can also cause leaks.
Lubricating Faucet Parts and Ensuring Proper Reassembly
Proper lubrication and careful reassembly are crucial for preventing future leaks.
- Apply Lubricant: Use a silicone-based lubricant sparingly on the O-rings, gaskets, and other moving parts. Avoid using petroleum-based lubricants, as these can damage some faucet materials.
- Inspect Parts: Carefully inspect all parts for damage before reassembly. Replace any worn or damaged components.
- Align Parts: Ensure all parts are correctly aligned during reassembly. Refer to the faucet’s instructions or diagrams if necessary.
- Tighten Securely: Tighten all nuts and screws securely, but avoid over-tightening, which can damage the parts.
Proper lubrication minimizes friction and wear, extending the lifespan of your faucet and preventing future leaks.
Conclusive Thoughts

Successfully diagnosing and repairing a leaky faucet is a rewarding experience, demonstrating your resourcefulness and saving you potentially significant costs. By systematically following the steps Artikeld, you’ve not only addressed the immediate problem but also gained valuable skills applicable to future plumbing maintenance. Remember, proactive maintenance is key to preventing larger, more expensive repairs down the line. So, take pride in your accomplishment and enjoy the newfound peace and quiet of a perfectly functioning faucet.