A flickering light bulb is more than just an annoyance; it’s often a symptom of a deeper electrical issue. From loose connections to faulty wiring, understanding the root cause is crucial for a safe and effective fix. This guide provides five practical methods to diagnose and resolve this common household problem, empowering you to tackle the issue confidently and efficiently.
We’ll explore simple checks like inspecting the bulb and fixture for damage, progressing to more advanced techniques such as testing voltage with a multimeter and repairing loose wiring. By systematically eliminating potential problems, you’ll not only restore your lighting but also gain valuable troubleshooting skills for future electrical challenges. Understanding the underlying causes will prevent further issues and ensure the longevity of your lighting system.
Identifying the Cause of Flickering
A flickering light bulb is a common household problem, often indicating a simple fix. However, understanding the underlying cause is crucial for effective troubleshooting. Flickering can stem from loose connections, faulty wiring, or problems with the bulb itself. Proper diagnosis will prevent further damage and ensure a safe and functional lighting system.
Let’s explore the most common reasons for flickering light bulbs and how to identify them.
Common Causes of Flickering Light Bulbs
The following table summarizes the common problems, their causes, the symptoms they produce, and their respective solutions. A systematic approach, starting with the simplest checks, will usually lead to a quick resolution.
| Problem | Cause | Symptoms | Solution |
|---|---|---|---|
| Loose Connection | A loose wire in the socket or fixture, or a poorly seated bulb. | Intermittent flickering, dim light, or complete failure to illuminate. | Tighten the bulb, check all wire connections in the socket and fixture, ensuring they are secure and properly seated. Replace the socket if damaged. |
| Faulty Wiring | Damaged or frayed wiring in the fixture or circuit, loose neutral wire, short circuit. | Consistent flickering, dimming, or buzzing sounds from the fixture. May affect other lights on the same circuit. | Inspect wiring for damage. If damage is found, consult a qualified electrician to repair or replace the wiring. Never attempt electrical repairs unless you are qualified to do so. |
| Bulb Issues | A failing or damaged light bulb, incorrect bulb type for the fixture. | Flickering, dimming, or a burning smell emanating from the bulb. | Replace the bulb with a new one of the correct wattage and type. Ensure the new bulb is compatible with the fixture. |
| Overloaded Circuit | Too many appliances or lights drawing power from the same circuit. | Dimming or flickering of multiple lights on the same circuit. | Reduce the number of devices on the circuit or consider adding a new circuit. Consult a qualified electrician if unsure. |
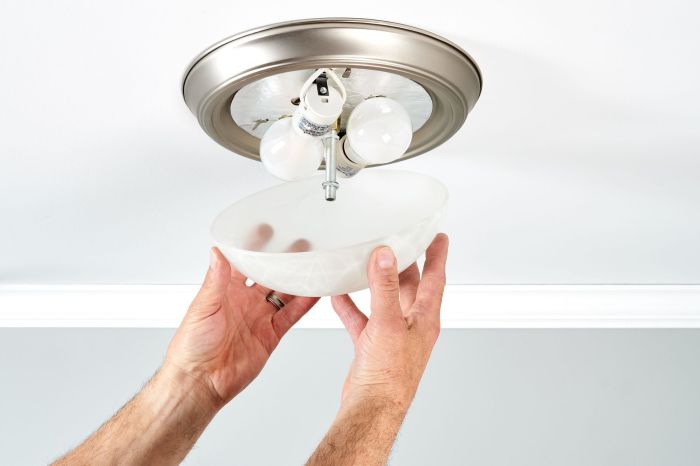
Visual Inspection of Light Fixture and Bulb
Before attempting any electrical work, always turn off the power to the light fixture at the circuit breaker. This is a crucial safety precaution to prevent electrical shock.
- Examine the Bulb: Carefully inspect the bulb for any visible cracks, burns, or loose filaments. Look for any signs of damage to the base that might prevent proper contact with the socket.
- Check the Socket: Look for any loose or damaged parts within the socket. Check if the contacts inside the socket are bent or corroded. Pay close attention to the area where the bulb base makes contact.
- Inspect the Wiring: If comfortable doing so (otherwise call an electrician), gently examine the wires connecting to the socket. Look for any signs of fraying, burning, or loose connections. Note: Only do this if you are familiar with electrical work and have turned off the power at the breaker.
- Assess the Fixture: Check the entire fixture for any signs of damage or loose parts. Look for anything that might be putting stress on the wiring or the socket.
Troubleshooting Flowchart
This flowchart provides a visual guide to systematically troubleshooting a flickering light bulb. Following this process will help pinpoint the problem efficiently.
(Imagine a flowchart here. The flowchart would start with “Flickering Light Bulb?”. The “Yes” branch would lead to “Check Bulb,” then to “Replace Bulb?” If “Yes,” the problem is solved. If “No,” it branches to “Check Socket,” then “Tighten Connections?” If “Yes,” the problem is solved. If “No,” it branches to “Check Wiring,” then “Call Electrician?” If “Yes,” the problem is solved. If “No,” it implies a more complex issue needing professional attention.)
Testing and Replacing Components
Troubleshooting flickering lights often involves testing individual components to pinpoint the problem. This systematic approach helps avoid unnecessary replacements and ensures a safe and effective repair. By carefully checking each part, you can efficiently identify and resolve the issue, restoring your lighting to its full functionality.
Before beginning any electrical work, always ensure the power is switched off at the breaker box. This crucial safety precaution protects you from electrical shock and potential injury. Never assume a light switch is off; always verify by checking the breaker.
Testing the Light Bulb
Testing the light bulb involves using a known good fixture to eliminate the bulb as the source of the problem. This simple test can quickly rule out a faulty bulb, saving time and effort. Carefully remove the bulb from the flickering fixture and screw it into a different, working light fixture. If the bulb flickers in the new fixture, the bulb itself is faulty and needs replacing. If it works normally, the problem lies elsewhere within the original fixture’s wiring or switch. Remember to handle the bulb gently to avoid breakage, particularly with fragile LED or CFL bulbs.
Checking the Light Switch and Wiring
Inspecting the light switch and its wiring for loose connections or damage is a crucial step in diagnosing flickering lights. Loose connections are a common cause of flickering, and identifying and tightening them often resolves the problem. Damage to the wiring can also lead to flickering, and this requires careful attention and potentially professional assistance for repair.
The following tools are necessary for this task:
- Screwdriver (Phillips and flathead)
- Voltage tester (non-contact is safest)
- Wire strippers/cutters (if replacing wiring)
- Electrical tape (if repairing wiring)
- Wire nuts (if repairing wiring)
To check the switch, turn off the power at the breaker box. Remove the switch plate and carefully remove the switch from the wall box. Inspect the wires for any signs of damage, fraying, or loose connections. Tighten any loose wire nuts securely. If you find any damaged wiring, it’s best to consult a qualified electrician for safe repair or replacement. Remember to always double-check your work before restoring power.
Replacing a Light Bulb
Replacing a light bulb seems straightforward, but choosing the right bulb and handling it safely is important. Different types of bulbs have varying lifespans, energy efficiency, and suitability for different fixtures.
Safety precautions for bulb replacement include turning off the power at the breaker box before handling any bulb. Always handle bulbs gently, avoiding touching the glass portion of incandescent or halogen bulbs to prevent burns or breakage. For CFL and LED bulbs, avoid excessive force when screwing them into the socket.
Here’s a comparison of common bulb types:
| Bulb Type | Lifespan | Energy Efficiency | Fixture Suitability |
|---|---|---|---|
| Incandescent | Short (750-2000 hours) | Low | Most fixtures |
| Halogen | Medium (2000-4000 hours) | Moderate | Most fixtures (heat considerations) |
| CFL (Compact Fluorescent) | Long (8000-15000 hours) | High | Most fixtures (may not be suitable for dimmers) |
| LED (Light Emitting Diode) | Very Long (25000-50000 hours) | Very High | Most fixtures (check wattage compatibility) |
Advanced Troubleshooting and Repairs
Persistent flickering despite replacing the bulb itself often points to deeper electrical issues within your home’s wiring or the light fixture itself. Addressing these problems requires a more systematic approach, incorporating safety precautions and the use of appropriate testing equipment. This section details advanced troubleshooting techniques to pinpoint and resolve these more complex electrical problems.
Identifying Electrical Circuit Problems
Voltage fluctuations and overloaded circuits are common culprits behind persistent light flickering. Voltage fluctuations, often caused by issues with the power supply or aging wiring, result in inconsistent power delivery to the light fixture. This can manifest as dimming, flickering, or even complete outages. Overloaded circuits occur when too many appliances or devices draw power from a single circuit, exceeding its capacity. This often leads to flickering lights, particularly when other high-power devices are in use on the same circuit. Identifying an overloaded circuit can be done by observing which other appliances are running when the flickering occurs. For example, if the lights flicker every time the air conditioner kicks on, it suggests the air conditioner and lights share an overloaded circuit. A significant drop in voltage can be observed using a multimeter, as detailed below.
Safe Voltage Testing with a Multimeter
Before attempting any electrical testing, always disconnect the power to the circuit at the breaker box. This crucial safety step prevents electric shock. Once the power is off, carefully use a multimeter to check the voltage at the light fixture.
- Set the Multimeter: Turn on the multimeter and set it to measure AC voltage (typically indicated by a symbol that looks like a “~”). Select a voltage range that exceeds the expected voltage in your home (usually 120V in North America, 230V in many other parts of the world).
- Connect the Probes: Carefully connect the multimeter’s probes to the wires leading to the light fixture. One probe should be connected to the black (neutral) wire and the other to the white (hot) wire.
- Observe the Reading: Observe the reading on the multimeter. If the voltage reading is significantly lower or higher than the expected voltage for your region, it indicates a voltage fluctuation. If the reading is zero, the circuit is correctly disconnected.
- Repeat the Process: Repeat steps 2 and 3 for other circuits if the voltage is within the expected range but flickering persists. This may help to identify the affected circuit.
Warning: Working with electricity can be dangerous. If you are not comfortable performing these tests, consult a qualified electrician.
Repairing Loose Wiring Connections
Loose wiring connections within the light fixture are another common cause of flickering. These connections can loosen over time due to vibrations or temperature changes, leading to intermittent contact and flickering. Repairing these requires careful attention to detail and adherence to safety procedures.
- Turn Off the Power: Before beginning any repairs, always turn off the power to the circuit at the breaker box. Double-check that the power is off by attempting to turn on the light switch – it should not illuminate.
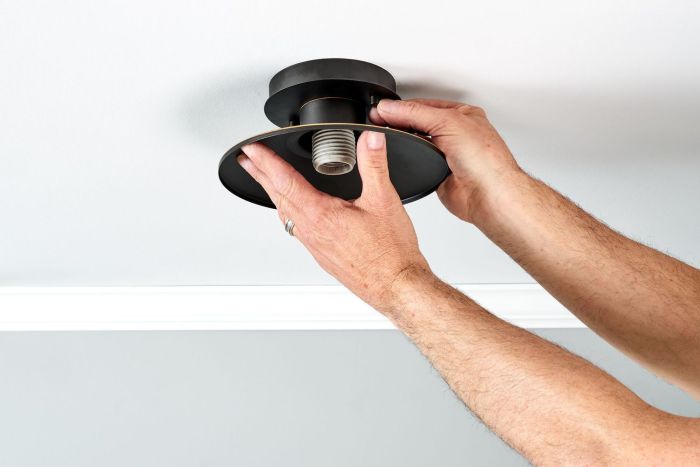
- Access the Wiring: Carefully remove the light fixture cover to access the wiring connections. Image 1: Close-up view of exposed wiring, showing the light fixture’s wiring connections; some wires may appear slightly darkened or discolored from age and heat.
- Inspect the Connections: Carefully inspect all wiring connections for looseness, corrosion, or damage. Image 2: A close-up shows a wire nut connection where the wires are not tightly twisted together, leading to a poor connection and potential for arcing.
- Tighten or Replace Connections: If the connections are loose, carefully tighten the wire nuts. Ensure that all wires are firmly twisted together and the wire nut is securely fastened. If the wires are damaged or corroded, replace the affected sections of wire and reconnect them using new wire nuts. Image 3: A close-up image showing new wire nuts securing tightly twisted wires; the wire ends are cleanly stripped, free of fraying, and correctly inserted into the wire nut.
- Reassemble the Fixture: Once all connections are secure and inspected, carefully reassemble the light fixture and restore power at the breaker box.
Last Word

Successfully diagnosing and fixing a flickering light bulb involves a combination of careful observation, methodical testing, and safe repair techniques. By following the steps Artikeld in this guide, you’ll be well-equipped to identify the problem, whether it’s a simple bulb replacement or a more complex wiring issue. Remember to prioritize safety throughout the process, and don’t hesitate to consult a qualified electrician for any tasks beyond your comfort level. With a little patience and the right approach, you can restore your lighting and avoid potential electrical hazards.