Frozen pipes: a homeowner’s nightmare. The sudden absence of water, the potential for costly repairs, the disruption to daily life – it’s a scenario best avoided. Understanding the common causes of frozen pipes and developing a proactive diagnostic approach can significantly reduce this risk. This guide provides a comprehensive overview of ten frequent culprits, detailing their impact and offering practical solutions for identification and remediation.
From identifying vulnerable locations within your home to mastering effective thawing techniques, we’ll equip you with the knowledge to tackle frozen pipes confidently and prevent future occurrences. We’ll explore both environmental and operational factors, guiding you through a systematic diagnostic process to pinpoint the source of the problem and restore your plumbing to full functionality.
Identifying Frozen Pipes
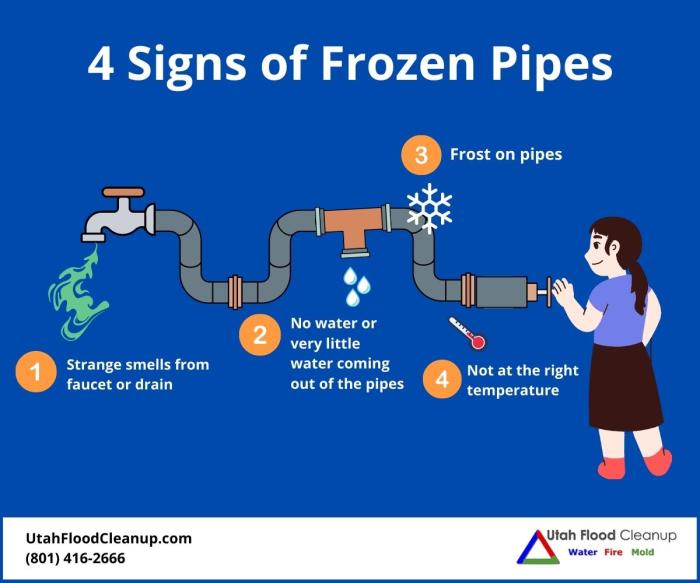
Identifying frozen pipes quickly is crucial to prevent costly water damage. Understanding common locations, visual cues, and the feel of a frozen pipe will help you address the problem before it escalates. Early detection significantly reduces the risk of pipe bursts and subsequent repairs.
Common Frozen Pipe Locations and Symptoms
Knowing where pipes are most vulnerable to freezing is the first step in prevention. Exposure to cold air, poor insulation, and proximity to exterior walls are key factors. The following table Artikels ten common locations and associated symptoms.
| Location | Typical Symptoms | Vulnerability Description |
|---|---|---|
| Exterior Walls | Cold spots on the wall, lack of water flow, gurgling sounds | Pipes running along exterior walls are directly exposed to cold temperatures. |
| Unheated Areas (attics, basements, garages) | No water flow, ice buildup visible in pipes, cracking sounds | These spaces often lack insulation and experience significant temperature fluctuations. |
| Crawl Spaces | Slow or no water flow, unusual noises from pipes | Limited insulation and exposure to cold ground temperatures make crawl spaces particularly susceptible. |
| Near Windows and Doors | Cold spots near the window or door frame, reduced water pressure | Drafts and cold air infiltration make these areas vulnerable. |
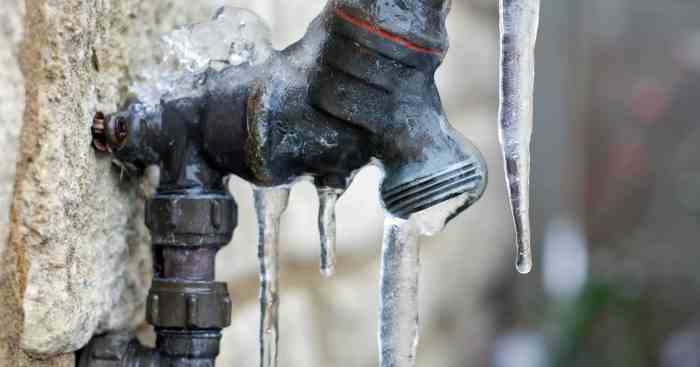
| Pipes Exposed to Outside Air | Ice buildup on the pipe, complete stoppage of water flow | Pipes running outside, such as those supplying outdoor faucets, are highly vulnerable. |
| Under Kitchen and Bathroom Sinks | Slow draining, gurgling sounds, ice buildup visible under the sink | These areas are often poorly insulated and pipes are close to exterior walls. |
| Water Meter | No water flow, ice buildup near the meter | The meter is often located outdoors or in an unheated area. |
| Pipes in Uninsulated Walls | Cold spots on the wall, reduced water pressure, slow or no water flow | Lack of insulation allows cold air to reach the pipes. |
| Above Ceilings | Water damage on the ceiling below, dripping sounds | Pipes in uninsulated attics or above ceilings are vulnerable to freezing temperatures. |
| Pipes Running Through Exterior Walls | Lack of water flow, unusual noises from the walls | These pipes are directly exposed to the outside temperature. |
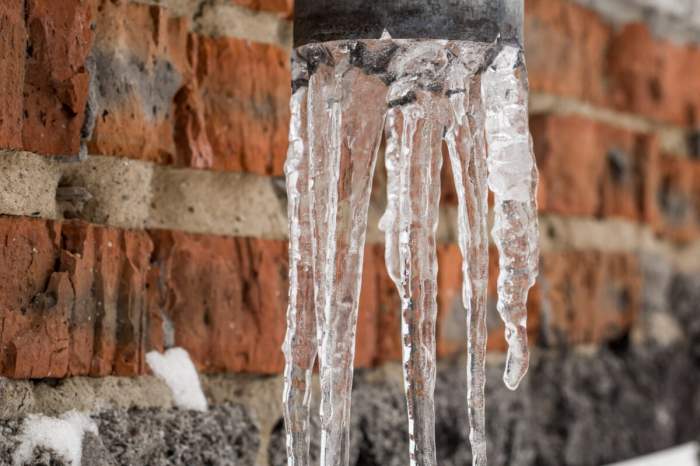
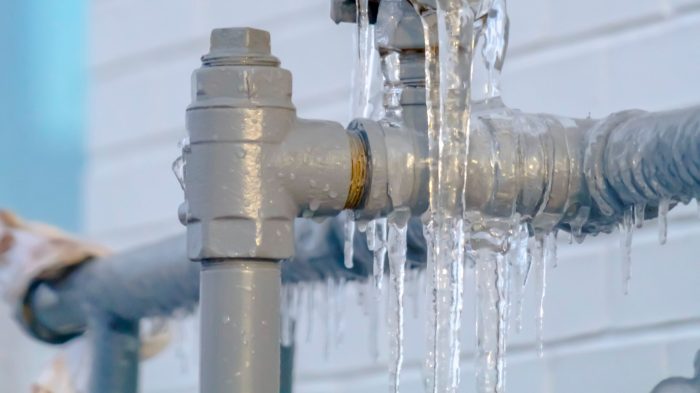
Visual and Auditory Signs of Frozen Pipes
Visual signs of frozen pipes can vary depending on the pipe material. For copper pipes, you might see a slight bulge or discoloration where the ice has formed. PVC pipes may appear slightly cracked or deformed due to the expansion of freezing water. Auditory cues include gurgling sounds from restricted water flow, or even a cracking sound as the ice expands within the pipe. A visible buildup of ice is a clear indication of a frozen pipe, regardless of the material.
Physical Characteristics of a Frozen Pipe
A frozen pipe will feel significantly harder and more rigid than a simply cold pipe. A cold pipe will still have some flexibility, while a frozen pipe will feel solid and unyielding to the touch. The temperature difference will also be noticeable; a frozen pipe will be much colder than a merely cold pipe. For example, a cold pipe might feel cool to the touch, while a frozen pipe will feel intensely cold, almost numbingly so.
Causes of Frozen Pipes
Frozen pipes, a common winter problem, result from a combination of environmental and operational factors. Understanding these causes is crucial for effective prevention and timely remediation. This section details ten common causes, categorized for clarity and actionable insights.
Environmental Factors Leading to Frozen Pipes
Environmental conditions significantly influence pipe freezing. Exposure to extreme cold and inadequate insulation are primary culprits. Let’s examine these in detail.
- Extreme Cold Temperatures: Prolonged exposure to sub-freezing temperatures is the most direct cause of pipe freezing. Water within pipes, especially those located in unheated areas like crawl spaces or exterior walls, will freeze when the ambient temperature drops sufficiently below 0°C (32°F).
- Insufficient Insulation: Pipes lacking adequate insulation are more vulnerable to freezing. Insulation acts as a barrier, slowing heat transfer from the pipe to the surrounding environment. Poor or insufficient insulation allows the surrounding cold to penetrate, lowering the pipe’s temperature and increasing the risk of freezing.
- Exposure to Cold Winds: Wind chill significantly accelerates heat loss from pipes, making them more susceptible to freezing. Pipes exposed to prevailing winds experience a more rapid temperature drop than those sheltered from the wind.
- Cold Air Infiltration: Leaks or gaps in building envelopes allow cold air to infiltrate, chilling pipes and increasing the risk of freezing. This is particularly problematic in areas near windows or doors with poor sealing.
Operational Factors Contributing to Frozen Pipes
Operational factors, related to how plumbing systems are used and maintained, also contribute to pipe freezing. These factors often exacerbate the effects of environmental conditions.
- Leaky Faucets: A constantly dripping faucet may seem insignificant, but the continuous flow of water can slowly deplete the heat within the pipe, increasing the risk of freezing, especially in cold climates.
- Infrequent Use: Pipes that are infrequently used, such as those supplying outdoor faucets or seldom-used rooms, are more prone to freezing. The lack of water flow prevents the replenishment of heat within the pipe.
- Low Water Pressure: Low water pressure reduces the volume of water flowing through the pipes, slowing the circulation of warmer water and increasing the chance of freezing.
- Improper Pipe Installation: Pipes installed improperly, such as those running through uninsulated areas or with inadequate slope for drainage, are more vulnerable to freezing. Improper installation can create pockets where water can stagnate and freeze.
- Lack of Proper Drainage: Poor drainage can lead to water pooling in low-lying areas of pipes, increasing the likelihood of freezing.
Diagnosing Frozen Pipe Causes: A Flowchart
A simple flowchart can aid in diagnosing the cause of a frozen pipe. This visual aid helps to systematically consider the various factors.
[Imagine a flowchart here. The flowchart would begin with a central question: “Pipe Frozen?” A “Yes” branch would lead to a series of questions about location (exterior wall, unheated area, etc.) and usage frequency. Based on the answers, the flowchart would point to likely causes, such as extreme cold, insufficient insulation, infrequent use, or leaky faucets. A “No” branch would simply end the flowchart.]
Insulation’s Impact on Pipe Temperature and Freezing Risk
Different insulation materials offer varying levels of protection against freezing. The effectiveness of insulation depends on its R-value (a measure of thermal resistance). Higher R-values indicate better insulation.
- Fiberglass Insulation: A common and relatively inexpensive option, fiberglass insulation provides good thermal protection but can be susceptible to moisture damage, reducing its effectiveness.
- Foam Insulation: Foam insulation, such as polyurethane or polyisocyanurate, offers excellent thermal resistance and is moisture-resistant, making it a superior choice for pipe insulation in many applications. Closed-cell foam is generally preferred for its superior moisture resistance.
- Heat Tape: Heat tape provides active heating, preventing freezing even in extreme cold. However, it requires electricity and should be installed and used according to manufacturer instructions to prevent fire hazards.
Diagnosing and Thawing Frozen Pipes
Diagnosing and safely thawing frozen pipes requires careful attention to detail and adherence to safety procedures. Improper thawing techniques can lead to property damage or personal injury. This section Artikels methods for identifying frozen pipes and safely thawing them, emphasizing the importance of preventative measures.
Thawing Frozen Pipes with a Hair Dryer
A hairdryer offers a relatively safe and effective method for thawing minor pipe freezes. However, it’s crucial to follow these steps and precautions:
- Identify the frozen section: Locate the frozen area of the pipe. This might be indicated by a cold spot, lack of water flow, or a visible bulge in the pipe.
- Prepare the area: Clear any obstructions around the pipe, ensuring good ventilation and easy access. Protect surrounding materials with towels or heat-resistant materials.
- Apply heat gradually: Set the hairdryer to a low heat setting. Direct the warm air flow onto the frozen section of the pipe, keeping the hairdryer moving continuously to prevent overheating any one spot. Maintain a safe distance to avoid burning yourself or damaging the hairdryer.
- Monitor the thawing process: Regularly check the pipe’s temperature. As the ice melts, you will feel a gradual warming of the pipe. If the pipe feels extremely cold, you might need to increase the heat setting slightly. However, avoid applying excessive heat.
- Check for leaks: Once the pipe is thawed, carefully inspect for any leaks or cracks. If leaks are present, immediately shut off the water supply and contact a plumber.
Safety Precautions: Never leave a hairdryer unattended while thawing a pipe. Avoid using high heat settings, as this can damage the pipe or cause burns. Keep flammable materials away from the hairdryer. If the pipe doesn’t thaw quickly or you feel any uncertainty, consult a qualified plumber.
Comparison of Thawing Methods
Different methods exist for thawing frozen pipes, each with varying effectiveness, safety, and cost implications.
| Method | Effectiveness | Safety Risks | Cost |
|---|---|---|---|
| Hair Dryer | Effective for minor freezes | Risk of burns, fire hazard if used improperly | Low |
| Heat Tape | Effective for various freeze severities | Risk of fire hazard if improperly installed or used | Moderate |
| Hot Water Bottles/Wraps | Effective for minor freezes, slow process | Risk of burns if handled improperly, potential for water damage | Low |
| Electric Heating Pad | Effective for minor freezes, slow process | Risk of overheating, fire hazard if used improperly | Low to Moderate |
| Professional Plumber | Most effective, addresses underlying issues | Minimal risk with professional handling | High |
Thawing Frozen Pipes with Heat Tape
Heat tape provides a more controlled and potentially faster thawing method than a hairdryer, especially for more extensive freezes. However, improper use poses a significant fire risk.
- Choose the right heat tape: Select self-regulating heat tape designed for plumbing applications. This type of tape automatically adjusts its heat output based on the ambient temperature, reducing the risk of overheating.
- Prepare the area: Ensure the pipe is clean and dry before applying the heat tape. Clear away any flammable materials. Protect surrounding surfaces with heat-resistant materials.
- Apply the heat tape: Wrap the heat tape snugly around the frozen section of the pipe, ensuring complete coverage. Overlapping the tape slightly is acceptable. Avoid bunching or kinking the tape.
- Secure the tape: Secure the heat tape with tape designed for high temperatures. Do not use duct tape or other tapes not rated for high heat.
- Connect to power: Plug the heat tape into a grounded outlet. Never leave the heat tape unattended while it is plugged in. Monitor the thawing process and the temperature of the tape.
- Inspect for leaks: Once the pipe is thawed, carefully inspect for any leaks or cracks. If leaks are present, immediately shut off the water supply and contact a plumber.
Safety Guidelines: Always follow the manufacturer’s instructions when using heat tape. Never cover the heat tape with insulation or other materials. Do not use heat tape on damaged or corroded pipes. If you detect any unusual smells (burning plastic) or overheating, immediately unplug the heat tape and contact a qualified plumber. Using heat tape incorrectly can lead to serious fire hazards.
Wrap-Up
Preventing frozen pipes requires a multi-pronged approach encompassing proactive measures and swift responses to early warning signs. By understanding the ten common causes detailed here, identifying vulnerable areas in your home, and employing safe thawing methods, you can significantly minimize the risk of experiencing this disruptive and potentially costly plumbing issue. Remember, prevention is key, but preparedness is equally crucial in protecting your home and minimizing potential damage.