A malfunctioning garbage disposal can disrupt your kitchen routine, creating unpleasant noises and potential plumbing issues. Understanding the common causes and employing effective diagnostic methods can save you time, money, and frustration. This guide Artikels five key approaches to pinpoint the problem and get your disposal working smoothly again, preventing minor issues from escalating into major headaches.
From identifying telltale sounds to employing advanced troubleshooting techniques, we’ll equip you with the knowledge to tackle most disposal dilemmas. Whether you’re a seasoned DIY enthusiast or a novice homeowner, this step-by-step approach will empower you to diagnose and resolve common garbage disposal problems efficiently and confidently.
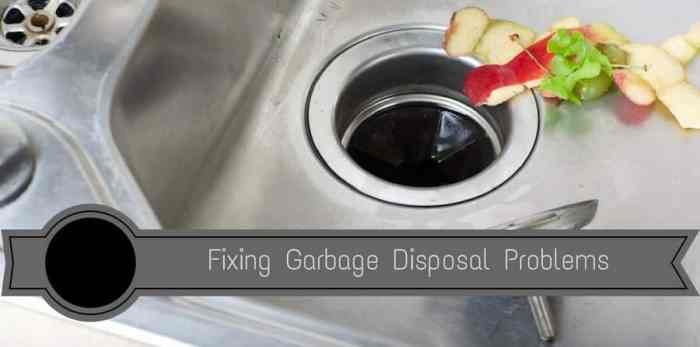
Identifying Common Garbage Disposal Issues
Garbage disposal malfunctions are a common household problem, often stemming from simple blockages or minor damage. Understanding the typical causes and how to identify them can save you time, money, and potential plumbing disasters. This section will detail common issues, visual inspection techniques, and the sounds a malfunctioning unit might produce.
Frequent Causes of Garbage Disposal Malfunctions
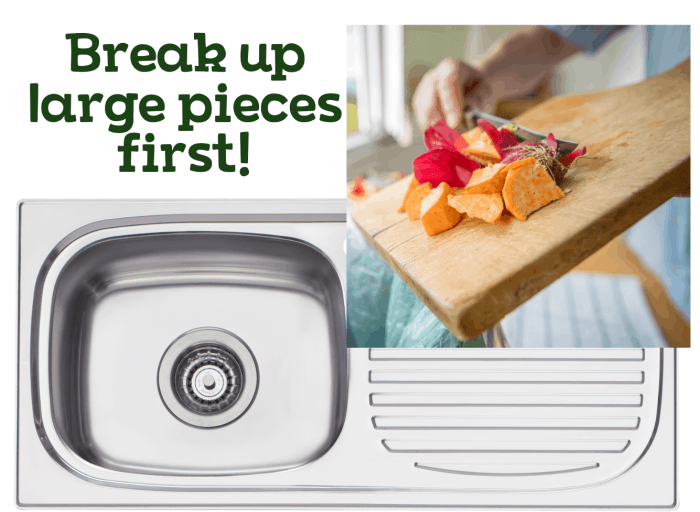
The most frequent causes of garbage disposal problems are related to improper use and the accumulation of debris. Overloading the disposal with excessive food waste, particularly hard or fibrous materials like bones, pits, and fibrous vegetables, is a primary culprit. These items can jam the impellers or become lodged in the drain, obstructing the flow of waste. Another common cause is the buildup of grease and fats, which solidify and cling to the interior walls of the disposal, eventually restricting the flow and creating a blockage. Finally, foreign objects such as silverware or jewelry accidentally dropped down the drain can cause serious damage to the unit’s internal components.
Visual Inspection of the Garbage Disposal
Before attempting any repairs, a thorough visual inspection is crucial. Begin by disconnecting the power to the unit—this is paramount for safety. Locate the reset button, usually a small red button located on the bottom of the unit. If it’s popped out, press it to reset the unit’s breaker. Carefully examine the disposal chamber for any visible obstructions. Use a flashlight to illuminate the area thoroughly. Look for any large pieces of food waste that might be obstructing the impellers or the drain opening. Check for any signs of damage to the impellers, such as bent or broken blades. Examine the outer housing for any cracks or damage that could indicate a more serious problem. Pay close attention to the drain opening itself; a significant clog might be visible there.
Sounds of a Malfunctioning Garbage Disposal
Understanding the sounds your garbage disposal makes can help you diagnose the problem. Different sounds often indicate different issues. The table below summarizes common sounds and their possible causes.
| Sound | Possible Cause | Severity | Recommended Action |
|---|---|---|---|
| Humming or buzzing | Overloaded or jammed disposal; possibly a tripped breaker | Low to Medium | Turn off power, check for obstructions, reset the breaker. |
| Grinding or rattling | Hard or unbreakable objects in the disposal chamber; damaged impellers | Medium to High | Turn off power, check for obstructions. If impellers are damaged, professional repair may be needed. |
| Gurgling or sputtering | Partial clog in the drainpipe; possible blockage further down the line | Medium | Try using a drain snake or plumber’s auger to clear the blockage. |
| Nothing at all | Tripped breaker; faulty motor; disconnected power | Low to High | Check the breaker box. If the breaker is not tripped, the motor may be faulty and require professional repair or replacement. |
Basic Troubleshooting Techniques

Before attempting any repairs, always ensure the power to your garbage disposal is switched off. This is a crucial safety precaution to prevent electric shock and injury. Simple troubleshooting can often resolve minor issues, saving you the expense and inconvenience of calling a plumber. These techniques are applicable to most standard garbage disposal units.
Resetting a Tripped Garbage Disposal Breaker
A tripped breaker is a common cause of a malfunctioning garbage disposal. Locate your home’s electrical panel. This is usually a metal box located in your basement, garage, or utility closet. Identify the breaker controlling your garbage disposal; it’s often labeled, but you may need to consult your home’s electrical schematic if the labels are unclear. The breaker will likely be in the “off” position. Carefully switch the breaker to the “on” position. If the breaker immediately trips again, there may be a more serious electrical problem requiring professional attention. Do not repeatedly attempt to reset the breaker if it continues to trip.
Clearing Minor Clogs with a Plumbing Snake
A plumbing snake, also known as a drain auger, is a flexible tool used to dislodge clogs in pipes. Insert the snake into the garbage disposal’s drain opening, typically located at the bottom of the unit. Carefully rotate the handle to feed the snake into the drainpipe. Feel for resistance; this indicates the snake has encountered the clog. Continue rotating and gently pushing the snake until you feel the clog break free. Slowly retract the snake, ensuring no debris remains within the disposal or drainpipe. Afterwards, run cold water for a few minutes to flush the system.
Manually Removing Trapped Debris
If a visual inspection reveals trapped debris, such as bone fragments or other hard objects, manual removal might be necessary. Always disconnect the power to the disposal before beginning this process.
- Using Tongs: Long-reach tongs can be used to grasp and remove larger pieces of debris. Carefully insert the tongs into the disposal chamber and retrieve the obstructing material. Be cautious not to damage the disposal’s internal components.
- Using Pliers: For smaller or more stubborn items, pliers can provide a firmer grip. Exercise caution to avoid scratching or damaging the internal surfaces of the disposal. Use a flashlight to improve visibility.
Common Access Points for Clearing Clogs
Understanding the location of access points is essential for effective clog removal. A visual guide is helpful in identifying these points.
Imagine a diagram showing a typical garbage disposal unit under a sink. Three key areas are highlighted:
- The Garbage Disposal Drain Opening: This is the most common access point, located at the bottom of the unit. It’s where the drainpipe connects to the garbage disposal and is the usual entry point for a plumbing snake. This opening is easily identifiable as it is the largest opening on the unit.
- The Sink Drain Strainer: Located at the bottom of the sink, this strainer prevents large debris from entering the disposal. If a clog occurs near this point, removing and cleaning the strainer might resolve the issue. This is often a simple screw-on or pop-up mechanism.
- The Dishwasher Connection (if applicable): Some garbage disposals have a connection for the dishwasher’s drain line. A clog in this line can affect the disposal’s function. This connection is typically a smaller opening located on the side or back of the unit. Accessing this point might require moving the dishwasher slightly.
Advanced Diagnostic Methods
Diagnosing complex garbage disposal problems often requires moving beyond basic troubleshooting. This section delves into more advanced techniques to pinpoint the source of the issue, focusing on motor problems and electrical connections. Understanding these methods allows for more precise repairs and avoids unnecessary part replacements.
Motor Problem Diagnosis
Several methods exist for diagnosing garbage disposal motor problems. A multimeter is crucial for assessing motor windings and detecting shorts or open circuits. Listening for unusual noises, like grinding or humming, can also indicate specific motor issues. Visual inspection for visible damage, such as burnt wires or a damaged motor capacitor, should also be conducted. The effectiveness of each method depends on the user’s technical skill and the availability of tools. Using a multimeter provides precise electrical readings, while listening for unusual sounds offers a quicker, less technical assessment. Visual inspection can quickly identify obvious damage but might miss subtle problems.
Signs of a Worn-Out Garbage Disposal Motor
A worn-out garbage disposal motor typically exhibits several tell-tale signs. These include a noticeable decrease in power, leading to slow or inefficient grinding. The motor might overheat frequently, potentially causing a burning smell. Unusual noises, such as grinding, humming, or whining, become more pronounced as the motor deteriorates. Finally, the motor may fail to start altogether. These symptoms, when taken together, strongly suggest the need for motor replacement. For example, a disposal that previously ground food quickly but now struggles even with small amounts of waste indicates reduced motor power. A burning smell coupled with a persistent humming sound points to overheating and possible winding damage.
Checking the Disposal’s Electrical Connections
Properly checking the electrical connections is essential for safe and effective garbage disposal repair. A faulty connection can prevent the motor from functioning or even pose a safety hazard. The following flowchart Artikels the troubleshooting steps:
Start --> Is the disposal plugged in? --> Yes: Proceed to next step; No: Plug in the disposal and try again. --> Is the circuit breaker tripped or fuse blown? --> Yes: Reset the breaker or replace the fuse; No: Proceed to next step. --> Is there power to the outlet? --> Yes: Proceed to next step; No: Check the outlet with another appliance. --> Check the wiring connections at the disposal itself, ensuring they are secure and undamaged. --> Is there continuity between the power source and the motor? --> Yes: Test the motor itself; No: Repair or replace wiring. --> Test the motor for continuity and resistance (using a multimeter). --> Is the motor functioning correctly? --> Yes: Problem likely elsewhere in the system; No: Replace the motor. --> End
Garbage Disposal Troubleshooting Table
| Problem | Symptom | Diagnostic Test | Potential Solution |
|---|---|---|---|
| Motor Failure | Disposal won’t turn on, humming sound, burning smell | Check power supply, test motor windings with multimeter | Replace motor, check wiring |
| Jammed Disposal | Disposal won’t turn, unusual noises | Manually remove any obstructions | Clear the jam, use tongs or pliers if needed |
| Faulty Electrical Connection | Disposal intermittently works or not at all | Check wiring connections for looseness or damage | Tighten or replace wiring, check circuit breaker/fuse |
| Worn-Out Impeller | Disposal grinds slowly or ineffectively | Inspect impeller for damage or wear | Replace impeller |
Last Point
Successfully diagnosing garbage disposal problems often involves a combination of visual inspection, basic troubleshooting, and potentially more advanced techniques. By systematically following the methods Artikeld above, you can effectively identify the root cause of the malfunction, whether it’s a simple clog, a tripped breaker, or a more serious motor issue. Remember, safety is paramount; if you’re unsure about any step, consult a qualified plumber. With a little patience and the right tools, you can restore your garbage disposal to its peak performance and maintain a smoothly functioning kitchen.