A malfunctioning oxygen sensor can significantly impact your vehicle’s performance, fuel efficiency, and emissions. Understanding how to diagnose a faulty sensor is crucial for maintaining optimal engine health and avoiding costly repairs. This guide provides five practical tests you can perform, ranging from simple visual inspections to using specialized diagnostic tools, empowering you to identify and address oxygen sensor issues effectively.
We’ll explore the function of the oxygen sensor, common failure modes, and how to interpret the results of each test. By following these steps, you’ll gain valuable insights into your vehicle’s health and be better equipped to make informed decisions regarding maintenance and repairs.
Understanding Oxygen Sensor Function and Failure Modes
The oxygen sensor is a crucial component in your vehicle’s emission control system and plays a vital role in fuel efficiency and engine performance. It constantly monitors the amount of oxygen in the exhaust gases, providing feedback to the engine’s computer (ECU) to adjust the air-fuel mixture for optimal combustion. A malfunctioning oxygen sensor can lead to decreased fuel economy, increased emissions, and even engine damage.
Oxygen sensors, typically located in the exhaust manifold, function by measuring the difference in oxygen concentration between the exhaust stream and the surrounding air. This difference is then converted into a voltage signal sent to the ECU. The ECU uses this signal to precisely control the fuel injectors, ensuring the engine runs efficiently and cleanly.
Oxygen Sensor Failure Modes
Several factors can cause an oxygen sensor to fail, leading to inaccurate readings and impacting engine performance. These failures can manifest in different ways, affecting the sensor’s ability to provide accurate data to the ECU. Common failure modes include a slow response time, where the sensor is sluggish in registering changes in oxygen levels, a short circuit, causing a consistently low voltage reading, or an open circuit, resulting in a consistently high voltage reading or no signal at all. These failures often result in a check engine light illumination, prompting the need for diagnostic testing.
Oxygen Sensor Types
There are primarily two types of oxygen sensors: heated and non-heated. Non-heated oxygen sensors rely on the exhaust gases to heat them up to their operating temperature, which can take some time, particularly when the engine is cold. This can lead to less accurate readings during cold starts. Heated oxygen sensors, on the other hand, have an internal heating element that allows them to reach operating temperature much faster, providing more accurate readings from the start. This results in improved fuel efficiency and reduced emissions, particularly during cold weather conditions. Heated sensors are more common in modern vehicles.
Comparison of Faulty Oxygen Sensor Symptoms with Other Engine Problems
The symptoms of a faulty oxygen sensor can sometimes mimic those of other engine problems, making diagnosis challenging. The following table helps differentiate these symptoms:
| Symptom | Faulty Oxygen Sensor | Other Possible Causes | Additional Notes |
|---|---|---|---|
| Check Engine Light | Yes, often accompanied by a specific diagnostic trouble code (DTC). | Numerous engine issues, including problems with the catalytic converter, mass airflow sensor, or ignition system. | The DTC code will help pinpoint the problem area. |
| Poor Fuel Economy | Yes, due to a rich or lean air-fuel mixture. | Faulty fuel injectors, clogged air filter, or low tire pressure. | Noticeable reduction in miles per gallon. |
| Rough Idling or Hesitation | Yes, due to inconsistent air-fuel mixture. | Spark plug issues, vacuum leaks, or throttle body problems. | Engine may stumble or shake during idle. |
| Black or Excessive Exhaust Smoke | Yes, often indicates a rich air-fuel mixture. | Faulty fuel injectors, leaking fuel pressure regulator, or a clogged catalytic converter. | Black smoke is a strong indicator of a rich mixture. |
Diagnostic Test Procedures

Diagnosing a faulty oxygen sensor often involves a multi-pronged approach combining visual inspection, voltage checks, and OBD-II diagnostics. This section details the practical steps involved in each test. Accurate execution of these procedures will help pinpoint the source of any oxygen sensor-related issues.
Checking Oxygen Sensor Voltage with a Multimeter
To accurately assess the oxygen sensor’s functionality, a multimeter is used to measure its voltage output. This voltage fluctuates based on the amount of oxygen in the exhaust, providing crucial information about its performance. The test should be performed while the engine is running at idle and at higher RPMs.
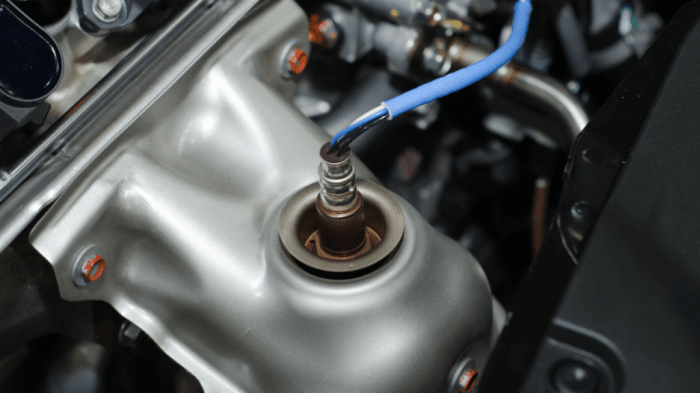
Before starting, ensure the engine is running smoothly and at operating temperature. Disconnect the oxygen sensor connector carefully. Using a multimeter set to DC voltage, connect the positive lead (red) to the sensor’s signal wire (typically a white or gray wire) and the negative lead (black) to a good ground point on the engine block.
Diagram: Imagine the multimeter probes. The red probe is connected to the oxygen sensor’s signal wire, carefully avoiding contact with any other wires. The black probe is firmly connected to a clean, unpainted metal surface on the engine block, ensuring a solid ground connection. The multimeter display will show the voltage reading. Observe the voltage readings at idle and under higher RPM conditions. A functioning oxygen sensor will exhibit a voltage that swings between approximately 0.1 volts and 0.9 volts, fluctuating rapidly as the engine’s oxygen content changes.
Visual Inspection of the Oxygen Sensor
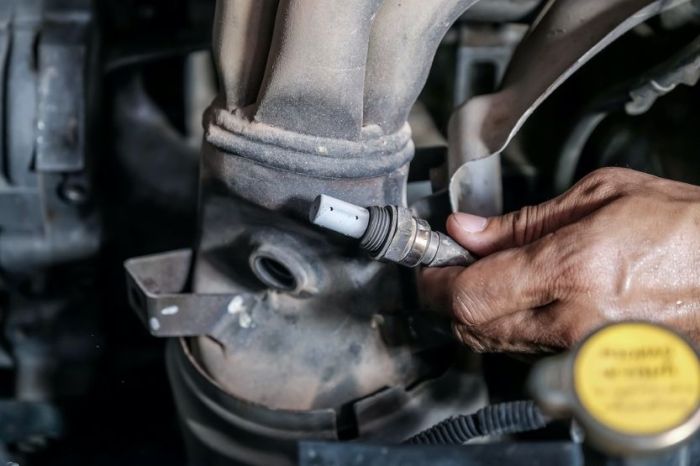
A visual inspection is the simplest first step in diagnosing oxygen sensor problems. Physical damage can significantly impair its function. This inspection helps identify obvious issues before proceeding to more complex tests.
Locate the oxygen sensor, typically found in the exhaust manifold or downstream. Carefully examine the sensor’s wiring harness for any signs of damage, such as fraying, breaks, or corrosion. Inspect the sensor itself for cracks, physical damage, or excessive soot buildup. Pay close attention to the sensor’s threads; damage here could prevent a proper seal, leading to inaccurate readings. If any damage is apparent, the sensor likely needs replacement.
Retrieving Oxygen Sensor DTCs with an OBD-II Scanner
OBD-II scanners are invaluable tools for accessing diagnostic trouble codes (DTCs) stored within the vehicle’s onboard computer. These codes provide valuable insights into potential problems, including issues with the oxygen sensor.
Connect the OBD-II scanner to the vehicle’s diagnostic port (usually located under the dashboard). Turn the ignition on (but don’t start the engine). The scanner will communicate with the vehicle’s computer and retrieve any stored DTCs. Look for codes specifically related to the oxygen sensors. These codes often indicate a malfunctioning sensor, a wiring problem, or a problem with the sensor’s heating element (for heated oxygen sensors). Refer to your scanner’s manual or an online DTC database for specific code interpretations.
Decision-Making Flowchart Based on Test Results
The following flowchart illustrates the decision-making process based on the results of the three tests.
Flowchart:
Start -> Visual Inspection: Damage found? Yes -> Replace Sensor; No -> Voltage Check: Voltage fluctuating 0.1-0.9V? Yes -> Sensor likely functioning; No -> OBD-II Scan: Oxygen Sensor DTCs? Yes -> Replace or Repair based on DTC; No -> Further diagnostics needed.
Interpreting Test Results and Troubleshooting

Interpreting the results of oxygen sensor diagnostic tests requires understanding the expected behavior of the sensor and the potential causes of deviations from that behavior. This involves analyzing diagnostic trouble codes (DTCs), voltage readings, and the overall performance of the sensor in relation to other engine components. Accurate interpretation is crucial for effective troubleshooting and repair.
Understanding the implications of various test results allows for efficient diagnosis and repair. This section will detail how to interpret diagnostic trouble codes, analyze voltage readings, and compare the effectiveness of different diagnostic methods, ultimately leading to targeted solutions.
Diagnostic Trouble Codes (DTCs) and Their Causes
Oxygen sensor DTCs typically indicate a malfunction within the sensor itself or a problem within the related circuitry. For example, a code like P0130 (Oxygen Sensor Heater Circuit Malfunction (Bank 1, Sensor 1)) points towards a problem with the sensor’s heater element, which is essential for quick warm-up and accurate readings at low temperatures. This could be due to a blown fuse, faulty wiring, or a failed heater element within the sensor itself. A code like P0135 (Oxygen Sensor Heater Circuit Malfunction (Bank 1, Sensor 1)) might indicate a slow or erratic response time, possibly due to a failing sensor element or contamination. Conversely, a code indicating a lean or rich condition (like P0171 or P0174) might point to an issue with the sensor’s readings but could also indicate problems elsewhere in the fuel delivery or air intake system, requiring further investigation.
Oxygen Sensor Voltage Readings and Their Significance
A functioning oxygen sensor produces a voltage signal that fluctuates between approximately 0.1 volts (lean condition) and 0.9 volts (rich condition) as it measures the amount of oxygen in the exhaust gases. A consistently low voltage reading (close to 0.1V) might indicate a consistently lean condition, suggesting a possible problem with the fuel injectors, fuel pump, or air intake system. Conversely, a consistently high voltage reading (close to 0.9V) may suggest a consistently rich condition, possibly caused by issues with the fuel injectors, mass airflow sensor, or a vacuum leak. A sensor that is stuck at a mid-range voltage (around 0.45V) or shows no voltage fluctuation at all, suggests a complete failure of the sensor element or a problem with the sensor’s wiring. These readings need to be interpreted in conjunction with other diagnostic data to pinpoint the root cause accurately.
Comparing Diagnostic Test Effectiveness
Different diagnostic tests provide varying levels of detail and accuracy. A simple voltage check using a multimeter provides a quick assessment of sensor functionality, but it doesn’t diagnose underlying problems. An advanced scan tool that reads DTCs and live data offers a more comprehensive view of sensor performance and allows for monitoring of voltage fluctuations over time. This detailed information is essential for accurately diagnosing intermittent problems. Furthermore, a visual inspection of the sensor and its wiring can reveal obvious signs of damage or corrosion, providing another crucial piece of the puzzle. The most effective approach combines these methods for a thorough diagnosis.
Troubleshooting Solutions Based on Identified Problems
| Problem | Potential Cause | Potential Repair | Replacement Parts |
|---|---|---|---|
| Slow/Erratic Sensor Response | Failing oxygen sensor element, contaminated sensor | Replace the oxygen sensor | Oxygen sensor |
| No Voltage Fluctuation | Faulty oxygen sensor, wiring issues | Check wiring, replace oxygen sensor | Oxygen sensor, wiring harness |
| Consistently Low Voltage | Lean condition (fuel delivery problem) | Inspect fuel system, check fuel pressure, replace fuel pump/injectors as needed | Fuel pump, fuel injectors, fuel filter |
| Consistently High Voltage | Rich condition (air/fuel mixture problem) | Inspect intake system for leaks, check mass airflow sensor, clean throttle body | Mass airflow sensor, throttle body, gaskets |
| Heater Circuit Malfunction | Blown fuse, faulty wiring, failed heater element | Check fuses, inspect wiring, replace oxygen sensor | Oxygen sensor, fuse |
Final Summary
Diagnosing a faulty oxygen sensor doesn’t need to be daunting. By systematically employing these five tests—visual inspection, voltage checks, OBD-II scans, and understanding related DTCs—you can pinpoint the problem and determine the necessary course of action. Remember to always consult your vehicle’s repair manual and consider seeking professional assistance if you’re uncomfortable performing any of these tests yourself. Proactive maintenance is key to ensuring your vehicle runs smoothly and efficiently for years to come.