A drafty door can significantly impact your home’s energy efficiency and comfort, leading to increased heating and cooling costs and uncomfortable temperature fluctuations. This guide provides a practical, step-by-step approach to identifying the source of the draft and implementing effective solutions, from simple weatherstripping to more advanced techniques. We’ll explore various methods for diagnosing the problem, compare different repair options, and offer preventative measures to keep your home warm and cozy throughout the year.
Understanding the nuances of air leakage around your door is crucial. This involves more than just a feeling of cold air; it’s about pinpointing the exact location of the leak to apply the most effective solution. Whether it’s a gap under the door, a poorly sealed frame, or worn-out weatherstripping, we will guide you through the process of identifying the culprit and implementing a lasting fix.
Identifying the Draft Source
Pinpointing the exact source of a draft in your door is crucial for effective repair. Drafts typically originate from several common areas, understanding these locations allows for targeted solutions. Ignoring even small leaks can lead to significant energy loss and discomfort over time.
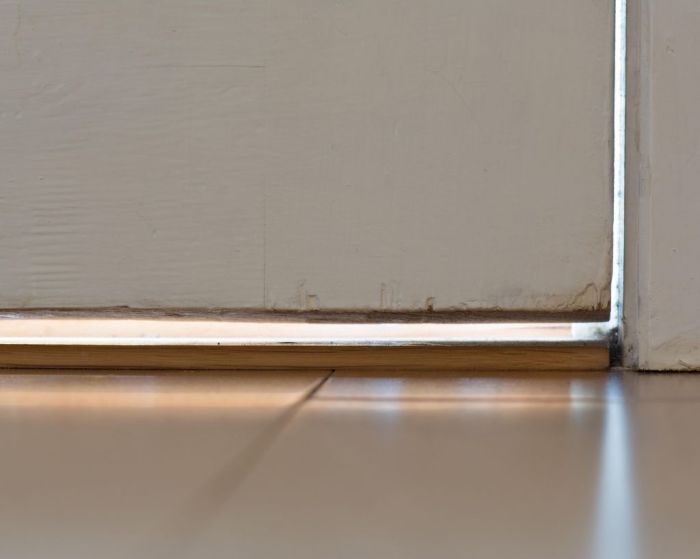
Drafts often originate from gaps and crevices around the door frame, the door itself, and even the threshold at the bottom. Poorly sealed areas allow cold air to enter and warm air to escape, leading to energy inefficiency and discomfort. Identifying these problem areas will allow you to address them effectively.
Locating Air Leaks with a Smoke Pencil
A smoke pencil provides a simple yet effective visual method for detecting air leaks. This inexpensive tool releases a thin stream of smoke, which will be drawn towards the areas of air infiltration. By carefully observing the smoke’s movement around the door frame and door, you can precisely pinpoint the locations of drafts. For example, if the smoke consistently flows into a gap between the door and the frame, this indicates a significant leak that requires attention. The smoke will visually trace the path of air movement, highlighting areas needing sealing.
Manual Detection of Air Movement
Feeling for air movement is a straightforward method for detecting drafts. Simply run your hand along the edges of the door frame and the door itself, paying close attention to any noticeable air currents. A cool breeze felt against your skin indicates an air leak. Focus on the top and bottom of the door, along the sides, and where the door meets the threshold. This tactile approach, while less precise than using a smoke pencil or infrared thermometer, is quick and effective in identifying significant drafts. For instance, a noticeable chill at the bottom of the door suggests a gap between the door and the threshold, or an issue with the weather stripping.
Infrared Thermometer Usage for Draft Detection
An infrared thermometer measures the surface temperature of objects without physical contact. By scanning the door frame and door, you can identify areas with lower temperatures than the surrounding surfaces. These cooler areas indicate air infiltration. For instance, if a section of the door frame registers 5 degrees Fahrenheit colder than the surrounding wall, it signifies a significant air leak at that point. A step-by-step guide follows:
- Turn on the infrared thermometer and allow it to calibrate.
- Point the thermometer at the door frame, maintaining a consistent distance throughout the scan.
- Record the temperature readings at various points around the door frame and the door itself.
- Compare the readings to identify areas with significantly lower temperatures.
- Areas with the lowest temperatures represent the primary sources of drafts.
Addressing the Draft

Once you’ve identified the source of the draft, it’s time to tackle it head-on. Several effective methods exist, each with its own advantages and disadvantages depending on the severity of the draft and your budget. Choosing the right approach will ensure a snug, energy-efficient seal around your door.
Weatherstripping Material Comparison
Different weatherstripping materials offer varying levels of durability, ease of installation, and cost-effectiveness. Foam, rubber, and felt are common choices, each possessing unique properties. Foam weatherstripping, often made from polyethylene or polyurethane, is inexpensive and easy to install, but it tends to compress over time, reducing its effectiveness. Rubber weatherstripping, typically made from EPDM or neoprene, is more durable and provides a better seal than foam, but it’s generally more expensive. Felt weatherstripping, a natural fiber material, is a good option for tighter spaces and offers decent insulation, but it can be less durable than rubber.
Weatherstripping Installation Techniques
The installation process varies slightly depending on the type of weatherstripping used. Foam tape typically adheres directly to the door frame or door itself using a peel-and-stick backing. Ensure the surface is clean and dry for optimal adhesion. Rubber weatherstripping often requires more precise measurement and cutting to fit the door frame. It may also involve using adhesive or small nails for secure installation. Felt weatherstripping can be similarly installed with adhesive or tacked into place. Always follow the manufacturer’s instructions for the specific product you’ve chosen. Precise measurement and careful application are key to achieving a successful seal.
Adjusting Door Hinges for Improved Seal
Loose or misaligned hinges can contribute significantly to drafts. Over time, hinges can loosen, causing the door to sag and create gaps. Adjusting the hinges can often remedy this. Tightening loose screws is the first step. If sagging persists, you may need to adjust the hinge pins slightly. This usually involves removing the hinge pin and adding shims (thin pieces of wood or metal) under the hinge to lift the door and improve its seal. This requires careful attention to detail and may necessitate using a hammer and chisel to create space for the shims. Consult a professional if you’re unsure about this process.
Cost-Effectiveness and Longevity of Sealing Solutions
The following table compares the cost-effectiveness and longevity of various sealing solutions:
| Material | Cost | Lifespan (Years) | Installation Difficulty |
|---|---|---|---|
| Foam Weatherstripping | Low | 1-3 | Easy |
| Rubber Weatherstripping | Medium | 5-7 | Medium |
| Felt Weatherstripping | Medium-Low | 3-5 | Medium |
| New Door Sweep | Low to Medium | 3-5 | Easy to Medium |
| Professional Door Adjustment | High | Variable (depending on repair) | N/A |
Advanced Techniques and Preventative Measures

Addressing drafts effectively involves not only immediate solutions but also proactive measures to prevent future issues. This section delves into more advanced techniques and preventative strategies for maintaining a draft-free home. We will explore effective installation methods, regular inspection checklists, and the pros and cons of replacing door thresholds. We’ll also provide detailed instructions for creating a custom draft stopper.
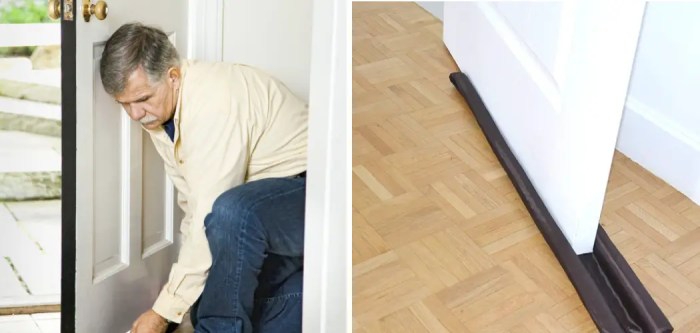
Installing a Door Sweep Effectively
Proper installation of a door sweep is crucial for its effectiveness. Begin by measuring the width of your door and purchasing a sweep of appropriate length. Ensure the sweep’s adhesive backing is clean and dry. Align the sweep with the bottom of the door, ensuring it’s level and flush against the door’s edge. Firmly press the sweep onto the door, working from the center outwards to ensure complete adhesion. Once installed, test the sweep by closing the door and checking for any gaps. If necessary, adjust the sweep’s position for optimal seal.
Regular Inspection Checklist for Draft Prevention
Regular inspections can help identify potential draft sources before they become significant problems. A simple checklist can streamline this process.
- Inspect the door frame for any gaps or cracks. Look for loose caulking or weatherstripping.
- Check the door sweep for wear and tear. Replace it if it’s damaged or no longer provides a tight seal.
- Examine the door threshold for any gaps or damage. Pay attention to the seal between the threshold and the door.
- Feel around the edges of the door for air leaks. Pay close attention to the areas where the door meets the frame.
- Inspect the exterior of the door for any damage that could compromise its seal, such as cracks or warping.
Benefits and Drawbacks of Installing a New Door Threshold
Replacing a damaged or worn door threshold can significantly improve energy efficiency and reduce drafts. However, it’s a more involved project than simply installing a door sweep.
- Benefits: A new threshold provides a complete and durable seal, preventing air infiltration from the bottom of the door. This can lead to noticeable improvements in energy efficiency and comfort.
- Drawbacks: Installation requires some DIY skills and the appropriate tools. It can also be a time-consuming process, potentially requiring adjustments to the door or frame. The cost of a new threshold can vary significantly depending on the material and style.
Tools and Materials for Comprehensive Door Draft Repair
Having the right tools and materials readily available will ensure a smooth and efficient repair process.
- Measuring tape
- Screwdriver (Phillips and flathead)
- Caulk gun
- Putty knife
- Door sweep
- Weatherstripping
- Caulk
- Level
- Safety glasses
Creating a Custom Draft Stopper
A custom draft stopper offers a cost-effective and personalized solution. It can be easily tailored to fit any door and adds a touch of personal style.
- Materials: A sturdy fabric tube (such as denim or canvas), filling material (rice, beans, or fabric scraps), sewing machine or needle and thread.
- Instructions: Cut the fabric to the desired length and width. Sew the fabric into a tube, leaving one end open. Fill the tube with the chosen filling material. Sew the open end closed. Position the draft stopper at the base of the door.
Concluding Remarks
By following these seven steps, you can effectively diagnose and resolve drafty door issues, improving your home’s energy efficiency and comfort. Remember, regular inspection and preventative maintenance are key to preventing future drafts and saving energy. From simple visual checks to the use of specialized tools, a proactive approach will ensure your home remains a haven of warmth and comfort for years to come. The investment in time and materials will quickly pay off in reduced energy bills and a more comfortable living environment.