A drafty window not only lets in unwanted chills but also contributes to higher energy bills and potential water damage. Understanding how to identify and repair a leaky window is a valuable skill for any homeowner, saving money and improving comfort. This guide provides a step-by-step approach to diagnosing the source of the leak and effectively implementing the necessary repairs, empowering you to tackle this common household problem with confidence.
From pinpointing the exact location of the leak using simple tools to selecting the appropriate caulking and sealing materials, we’ll cover the entire process, offering practical advice and clear instructions. Whether you’re a seasoned DIY enthusiast or a novice tackling home repairs for the first time, this guide will equip you with the knowledge and confidence to restore your windows to their optimal performance.
Identifying the Leak Source
Pinpointing the exact source of a window leak is crucial for effective repair. A systematic approach, combining visual inspection with simple testing, will quickly lead you to the culprit. Ignoring even a small leak can lead to significant water damage over time, impacting both the window and the surrounding structure.
Common locations for window leaks include the areas where the window frame meets the wall, the seals around the glass panes, and the caulking along the exterior and interior window edges. Leaks can also originate from damaged or deteriorated window components, such as cracked or warped frames.
Visual Inspection of Window Components
A thorough visual inspection is the first step in identifying a leak. Carefully examine the caulking, seals, and frame for any signs of damage, deterioration, or gaps. Look for cracks, gaps, missing sections, or discoloration in the caulking. Inspect the seals around the glass panes for any signs of separation or damage. Check the window frame itself for any cracks, warping, or rot. Pay close attention to the corners and joints of the frame, as these are common areas for leaks to develop. Using a magnifying glass can help in detecting small cracks or gaps that might otherwise be missed.
Using a Flashlight and Water Spray to Locate Leaks
Once a potential leak area has been identified visually, further investigation may be necessary to pinpoint the exact location. A simple flashlight can reveal hidden cracks or gaps by shining it at an oblique angle to highlight shadows or reflections that indicate openings. Alternatively, a gentle spray of water (using a garden hose or spray bottle on a dry day) onto the suspected area can help to quickly visualize where water is entering. Watch carefully for water penetration, paying close attention to the areas where the water seems to enter. This method is especially effective for identifying leaks in caulking or seals.
Leak Source Comparison Table
Creating a table to compare different leak sources and their symptoms can streamline the diagnostic process. This organized approach facilitates a more efficient and effective identification of the problem. Below is an example of such a table. Note that these are common symptoms, and the specific presentation might vary depending on the window type and the severity of the leak.
| Leak Source | Typical Symptoms | Visual Indicators | Testing Method |
|---|---|---|---|
| Caulking Failure | Water staining around the window frame, water intrusion near the frame-wall junction. | Cracks, gaps, shrinkage, or discoloration in the caulking. | Water spray test along the caulking line. |
| Seal Failure | Water intrusion between the glass panes and the frame, condensation or fogging between panes. | Gaps or separation between the glass and frame, signs of sealant deterioration. | Careful visual inspection, flashlight examination. |
| Frame Damage | Water intrusion along cracks or gaps in the frame, rotting or warping of the frame material. | Cracks, warping, rot, or insect damage in the window frame. | Visual inspection, flashlight examination. |
| Window Pane Crack | Water intrusion directly through a crack in the glass. | Visible cracks or chips in the window pane. | Visual inspection, sometimes difficult to detect with water spray. |
Assessing the Damage and Choosing Repair Methods
Once you’ve pinpointed the source of your leaky window, it’s time to evaluate the extent of the damage and determine the best repair strategy. This involves understanding your window type, assessing the severity of the leak, and selecting appropriate materials and techniques. Choosing the right approach will ensure a long-lasting and effective solution.
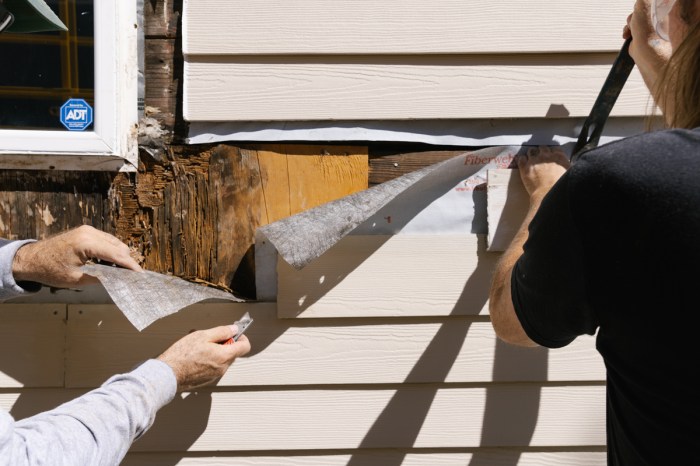
Different window types exhibit varying degrees of susceptibility to leaks. Older windows, particularly those made of wood, are more prone to deterioration and leaks due to wood rot and sealant degradation. Aluminum windows, while generally more durable, can still develop leaks around the frame or through compromised seals. Vinyl or uPVC windows are usually more resistant to water damage, but improper installation or damage to the frame can still lead to leaks. The age, material, and condition of the window frame and surrounding sealant will significantly influence the repair method.
Window Material and Leak Susceptibility
Wood windows, due to their porous nature, are particularly vulnerable to water damage leading to rot and subsequent leaks. Aluminum frames, while resistant to rot, can corrode over time, compromising the seal and allowing water ingress. Vinyl or uPVC windows are generally the most resistant to water damage, but improper installation can create gaps that allow water to seep in. The type of glass and its seal also plays a crucial role. Older windows may have deteriorated glazing seals, allowing moisture to penetrate between the panes.
Caulking and Sealing Materials
Several materials are suitable for caulking and sealing windows effectively. Silicone caulk is a popular choice due to its flexibility, durability, and water resistance. It is ideal for sealing gaps and cracks around window frames. Acrylic latex caulk is another good option, offering good adhesion and paintability, making it suitable for cosmetic repairs. Butyl rubber sealant is a more specialized option, often used for sealing larger gaps or areas exposed to significant movement. The choice of material depends on the size of the gap, the window material, and the level of exposure to the elements. For example, silicone is preferable in areas with high moisture, while acrylic latex might be sufficient for smaller, less exposed gaps.
Preparing the Window Surface for Resealing
Before applying new caulk, it’s crucial to thoroughly remove all old, cracked, or deteriorated caulk. A utility knife or caulk removal tool can be used to carefully cut away the old sealant. Once the old caulk is removed, clean the window frame thoroughly using a wire brush or scraper to remove any loose debris or dirt. A degreaser can be used to ensure a clean, dry surface for optimal adhesion of the new sealant. Proper surface preparation is essential for a long-lasting and effective seal. Failing to adequately prepare the surface can result in the new caulk failing prematurely.
Choosing Between DIY Repair and Professional Assistance
The following flowchart illustrates the decision-making process for selecting between a DIY repair and seeking professional help:
[Imagine a flowchart here. The flowchart would start with a diamond: “Is the leak minor (small crack, minor sealant failure)?” A “Yes” branch leads to a rectangle: “Attempt DIY repair using appropriate caulking materials.” A “No” branch leads to a diamond: “Is the damage extensive (significant rot, broken frame, large gaps)?” A “Yes” branch leads to a rectangle: “Consult a professional window repair specialist.” A “No” branch leads back to the first diamond, suggesting a re-evaluation of the damage.]
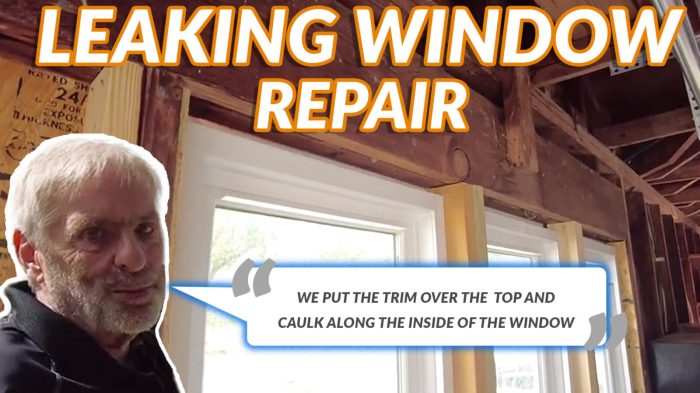
Repairing the Leaky Window
Repairing a leaky window involves addressing the source of the leak and properly sealing any gaps or cracks. This often entails applying new caulk, replacing damaged weatherstripping, or even addressing more significant issues like rotted window frames. Careful attention to detail during this phase is crucial for preventing future leaks and maintaining the energy efficiency of your home.
Applying New Caulk to Seal a Window
Proper caulk application is essential for a long-lasting seal. Here’s a step-by-step guide:
- Preparation: Clean the window frame thoroughly. Remove any loose paint, old caulk, or debris using a putty knife and wire brush. An image would show a person meticulously cleaning a window frame with a putty knife and wire brush, ensuring all surfaces are clean and free of loose materials. The frame is visibly old, with some chipped paint.
- Applying Primer (Optional): For certain surfaces, a primer can improve adhesion. An image would show a person carefully applying a thin, even coat of primer to the cleaned window frame using a small brush. The primer is a light grey color, contrasting with the darker window frame.
- Caulk Application: Cut the caulk tube tip at a 45-degree angle to create a smooth bead. Apply the caulk in a continuous bead, pressing firmly and evenly along the window frame. An image would show a hand applying caulk to the window frame, with a smooth, even bead visible along the entire length. The caulk is white, clearly contrasting with the dark frame.
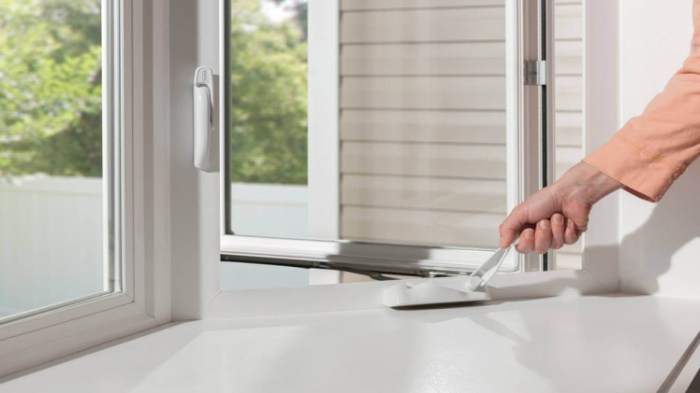
- Smoothing the Caulk: Use a wet finger or a caulk smoothing tool to create a smooth, even finish. An image would show a person gently smoothing the caulk bead with a wet finger, creating a neat and seamless appearance. The caulk is now smoothly integrated into the window frame.
- Allowing for Curing: Allow the caulk to cure completely according to the manufacturer’s instructions. An image would show the finished window frame, with the caulk looking smooth, cured, and completely adhered. The image highlights the clean lines and the lack of any gaps or imperfections.
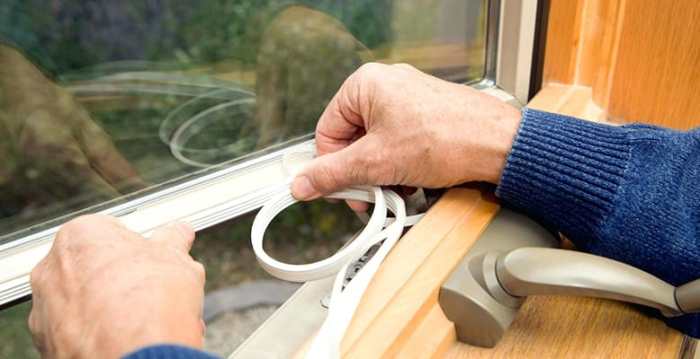
Replacing Damaged Window Seals or Weatherstripping
Replacing damaged seals or weatherstripping is often necessary to restore a window’s airtight seal. This requires the right tools and materials.
Tools and Materials: You’ll need a putty knife, screwdriver (possibly multiple types depending on the window), new weatherstripping (choose the appropriate type for your window), and possibly adhesive. For certain types of windows, specialized tools might be necessary.
The process involves carefully removing the old weatherstripping, cleaning the window frame, and then applying the new weatherstripping, ensuring a snug fit. An image would depict the process, starting with the removal of old, cracked weatherstripping using a putty knife, followed by the careful application of new weatherstripping, pressed firmly into place. The image would highlight the difference between the old and new weatherstripping, emphasizing the improved seal.
Common Mistakes to Avoid During Window Repair
Several common mistakes can compromise the effectiveness of window repairs.
- Improper Cleaning: Failing to thoroughly clean the surface before applying caulk or weatherstripping can lead to poor adhesion and leaks.
- Using Incorrect Caulk: Selecting the wrong type of caulk for the application can result in a weak or short-lived seal.
- Applying Caulk Too Thickly: A thick bead of caulk can crack and fail to adhere properly.
- Not Allowing Sufficient Curing Time: Using the window before the caulk or sealant has fully cured can compromise the seal.
Caulk Type Comparison
| Caulk Type | Flexibility | Durability | Application Method |
|---|---|---|---|
| Silicone | High | High | Caulk gun |
| Acrylic Latex | Medium | Medium | Caulk gun |
| Butyl Rubber | High | High | Caulk gun, sometimes hand-applied |
| Polyurethane | Medium-High | High | Caulk gun, foaming applications available |
Last Recap
Addressing a leaky window effectively involves a systematic approach, from careful inspection and damage assessment to the precise application of repair materials. By following the steps Artikeld in this guide, you can confidently diagnose the source of the leak, select the appropriate repair method, and execute the repairs successfully. Remember, preventing future leaks through regular maintenance is key to long-term window health and energy efficiency. Taking proactive steps will safeguard your home and your investment.