A leaky swimming pool can be a frustrating and costly problem. Fortunately, detecting the source of the leak doesn’t require immediate panic or expensive professional intervention. By employing a combination of visual inspection, water level monitoring, and specialized equipment, you can significantly increase your chances of pinpointing the leak and initiating timely repairs. This guide Artikels three effective methods to help you diagnose the issue efficiently and effectively.
Understanding the different approaches allows for a systematic troubleshooting process, starting with simple visual checks and progressing to more advanced techniques if necessary. This approach minimizes unnecessary expense and maximizes the chances of a successful repair.
Visual Inspection Methods
Locating a swimming pool leak often begins with a thorough visual inspection. This non-invasive method can quickly identify many common leak sources, saving time and money compared to more complex diagnostic techniques. Careful observation of key areas can significantly narrow down the search and guide subsequent testing.
A systematic visual inspection should cover the entire pool structure, focusing on areas prone to leaks. Begin by examining the pool shell itself, looking for cracks, fissures, or any signs of deterioration. Pay close attention to the areas around any fittings, such as lights, drains, and skimmers, as these are frequent points of failure. Inspect the tile lines meticulously, checking for loose or cracked tiles, grout deterioration, or gaps between the tiles and the pool shell. These imperfections can allow water to escape. Finally, don’t neglect the pool equipment; inspect pumps, filters, and pipes for any signs of leakage, such as dampness, discoloration, or visible water dripping.
Common Leak Locations and Visual Indicators
Certain areas of a swimming pool are more susceptible to leaks than others. The following table summarizes common leak locations and their associated visual indicators.
| Location | Visual Indicators | Further Investigation | Repair Method |
|---|---|---|---|
| Pool Shell | Cracks, hairline fractures, discoloration, pitting | Dye test, pressure test | Patching, structural repair |
| Tile Lines | Cracked or missing tiles, deteriorated grout, gaps between tiles and shell | Dye test, close visual inspection | Regrouting, tile replacement |
| Pipes and Fittings | Water stains, dampness, visible leaks, corrosion | Pressure test, visual inspection of all plumbing | Pipe repair or replacement, fitting tightening |
| Skimmers and Main Drains | Water seeping around the fitting, cracks in the fitting itself | Dye test, careful inspection for cracks | Sealing, replacement of faulty parts |
| Equipment (Pump, Filter) | Water pooling around equipment, dripping water | Inspect all seals and connections for leaks | Tightening connections, replacement of worn seals |
Dye Testing for Leak Detection
Dye testing is a simple yet effective method for pinpointing the precise location of a pool leak. It involves introducing a non-toxic dye into the pool water and observing where it emerges. The dye’s visibility allows for accurate identification of even minor leaks that might otherwise go unnoticed.
- Select the appropriate dye: Use a food-grade dye designed for pool leak detection. These dyes are specifically formulated to be visible against the pool’s surface and are safe for both the pool and its occupants.
- Introduce the dye: Add the dye directly to the pool water, ensuring it’s evenly distributed. The quantity of dye needed will depend on the pool’s size and the suspected leak’s severity.
- Monitor the pool: Observe the pool closely, paying attention to areas where the dye might surface. This may take several hours, depending on the leak’s size and the pool’s filtration system.
- Identify the leak: Once the dye emerges, the location of the leak is easily identified. Note the exact point where the dye appears to pinpoint the leak’s origin.
Pressure Testing for Plumbing Leaks
A pressure test is crucial for detecting leaks within the pool’s plumbing system. This method involves pressurizing the plumbing lines and monitoring for pressure drops, indicating a leak. It’s essential to isolate sections of the plumbing to pinpoint the leak’s location efficiently.
- Isolate sections of the plumbing: Shut off valves to isolate specific sections of the plumbing system, such as the main drain lines, return lines, or equipment lines. This allows for focused testing and precise leak localization.
- Pressurize the system: Use an air compressor or a specialized pressure testing equipment to pressurize the isolated section of plumbing to a predetermined pressure. Ensure that the pressure gauge is accurate and properly calibrated.
- Monitor pressure changes: Carefully observe the pressure gauge for any pressure drops. A gradual or sudden decrease in pressure indicates a leak within the isolated section. The rate of pressure drop can often indicate the severity of the leak.
- Locate the leak: Once a leak is detected, carefully examine the isolated section of plumbing for any signs of water leakage or dampness, using the pressure drop as a guide to the location.
Water Level Monitoring Techniques
Detecting a pool leak through water level monitoring involves carefully observing and recording changes in the water level over a period of time. A consistent, gradual drop indicates a potential leak, especially if other factors like evaporation and water usage are accounted for. This method is particularly useful for identifying slow leaks that might not be immediately apparent through visual inspection.
Water level fluctuations can be effectively tracked using simple, yet accurate methods. Regular measurements, combined with detailed record-keeping, allow for the identification of trends that pinpoint the presence and potential severity of a leak.
Accurate Water Level Measurement and Recording
To accurately measure the water level, use a reliable measuring device such as a measuring tape or a long, straight stick marked with increments. Always take measurements from the same point on the pool’s wall, ensuring consistent positioning to minimize error. Record the date, time, and measured water level in a dedicated logbook or spreadsheet. Include any relevant information, such as weather conditions (temperature and rainfall) and pool usage (swimming, cleaning, etc.), as these can affect the water level. Ideally, measurements should be taken at the same time each day to maintain consistency. Consistent recording is crucial for identifying subtle, gradual changes that may signal a leak.
Interpreting Water Level Fluctuations
The following table illustrates how to record and interpret water level changes over time. A consistent downward trend, even a small one, after accounting for normal water loss, suggests a potential leak.
| Date | Time | Water Level (cm) |
|---|---|---|
| October 26, 2024 | 8:00 AM | 120 |
| October 27, 2024 | 8:00 AM | 118 |
| October 28, 2024 | 8:00 AM | 116 |
| October 29, 2024 | 8:00 AM | 114 |
| October 30, 2024 | 8:00 AM | 112 |
This example shows a consistent 2cm drop per day, indicating a potential leak. Note that evaporation and water usage must be considered; this example assumes these factors are minimal or accounted for.
Manual vs. Automated Water Level Monitoring
Manual water level monitoring, as described above, is a cost-effective method requiring minimal equipment. However, it relies on consistent effort and accuracy from the pool owner. Automated systems, such as electronic water level sensors connected to a monitoring device, provide continuous, precise measurements and often include alerts for significant water level drops.
Manual monitoring offers simplicity and low initial cost, but it requires regular attention and can be prone to human error. Automated systems offer convenience, precision, and early leak detection, but they involve higher initial investment and potential maintenance costs. The choice depends on budget, technical skills, and the level of monitoring desired. For instance, a homeowner with limited time might prefer an automated system, while someone comfortable with regular checks might opt for the manual approach.
Specialized Leak Detection Equipment

Pinpointing a pool leak can be challenging, especially when visual inspections and water level monitoring prove inconclusive. This is where specialized leak detection equipment comes into play, offering a more precise and efficient method for identifying the source of the problem. These tools utilize advanced technology to detect even the smallest leaks, saving time and resources in the long run.
Electronic leak detection equipment, primarily acoustic leak detectors, are invaluable tools for identifying leaks in swimming pools. These devices work by listening for the characteristic sounds of escaping water. A tiny leak might produce a high-pitched hiss, while a larger leak could create a more pronounced rushing or gurgling sound. The detector amplifies these sounds, making them audible even in noisy environments. The operator moves the sensor probe across the pool’s surface and subsurface, carefully listening for changes in the sound level. Higher sound levels indicate a potential leak location. The process often involves comparing readings from multiple locations to pinpoint the leak’s precise source.
Acoustic Leak Detector Operation and Interpretation
Acoustic leak detectors utilize sensitive microphones to pick up the high-frequency sounds of escaping water. These sounds, often imperceptible to the human ear, are amplified and processed by the device. The operator systematically scans the pool’s structure, both above and below the waterline, listening for variations in the sound intensity. A sharp increase in sound, often accompanied by a characteristic hissing or rushing sound, points towards a potential leak location. The detector’s readings are usually displayed on a screen, showing the sound intensity in decibels or a similar unit. Experienced technicians can interpret these readings to determine the leak’s size and location with a high degree of accuracy. For instance, a consistent high-pitched hiss at a specific location might indicate a small pinhole leak in the pool’s plumbing, whereas a more intense, gurgling sound could suggest a larger crack in the pool shell.
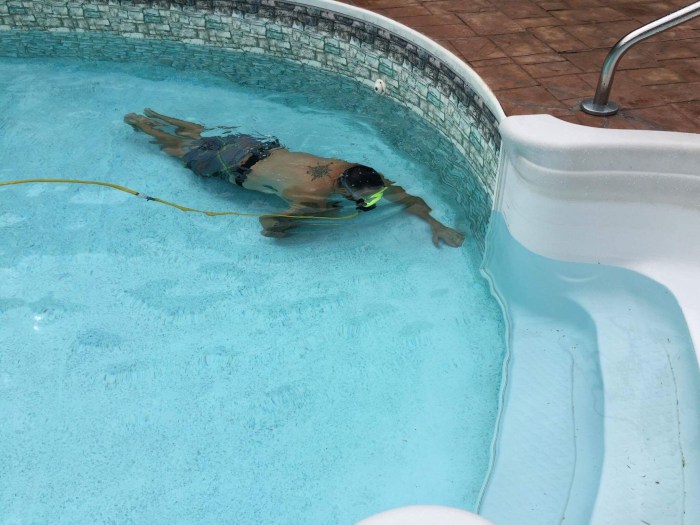
Underwater Leak Detection Device Operation and Interpretation
Underwater leak detection devices typically involve a submersible probe that is lowered into the pool. This probe is equipped with sensors that detect changes in water pressure or flow. The operator moves the probe systematically across the pool’s bottom and walls. A leak will often manifest as a localized area of reduced pressure or increased flow. The device usually displays the readings on a screen, often graphically, to help visualize the leak’s location. A leak might sound like a faint hissing or bubbling sound, which is amplified by the probe’s hydrophone. This sound, coupled with the pressure or flow readings, provides a comprehensive picture of the leak’s characteristics. The process is repeated in different sections of the pool until the leak is identified.
Comparison of Specialized Leak Detection Equipment
Several types of specialized leak detection equipment are available, each with its own strengths and weaknesses. The choice of equipment depends on factors such as the size and type of pool, the suspected location of the leak, and the budget available.
| Equipment Type | Strengths | Weaknesses |
|---|---|---|
| Acoustic Leak Detector | Relatively inexpensive, easy to use, effective for detecting leaks in various locations (pipes, shell). | Can be affected by background noise, may require experience to interpret readings accurately. |
| Underwater Leak Detection Device | Highly accurate, can pinpoint leaks in submerged structures, provides visual representation of leak location. | More expensive than acoustic detectors, requires specialized training to operate effectively. |
| Dye Testing | Simple and visual, effective for identifying leaks in above-ground pools or those with easily accessible areas. | Less effective for detecting underground leaks, may require significant water loss before a leak is visually confirmed. |
Ending Remarks

Diagnosing a swimming pool leak effectively combines careful observation with the strategic use of technology. While visual inspection provides a foundational understanding, water level monitoring reveals subtle leaks over time. Employing specialized equipment then offers precise localization, leading to targeted repairs and preventing further water loss and structural damage. By systematically employing these three methods, you can confidently address pool leaks and maintain your pool’s integrity.